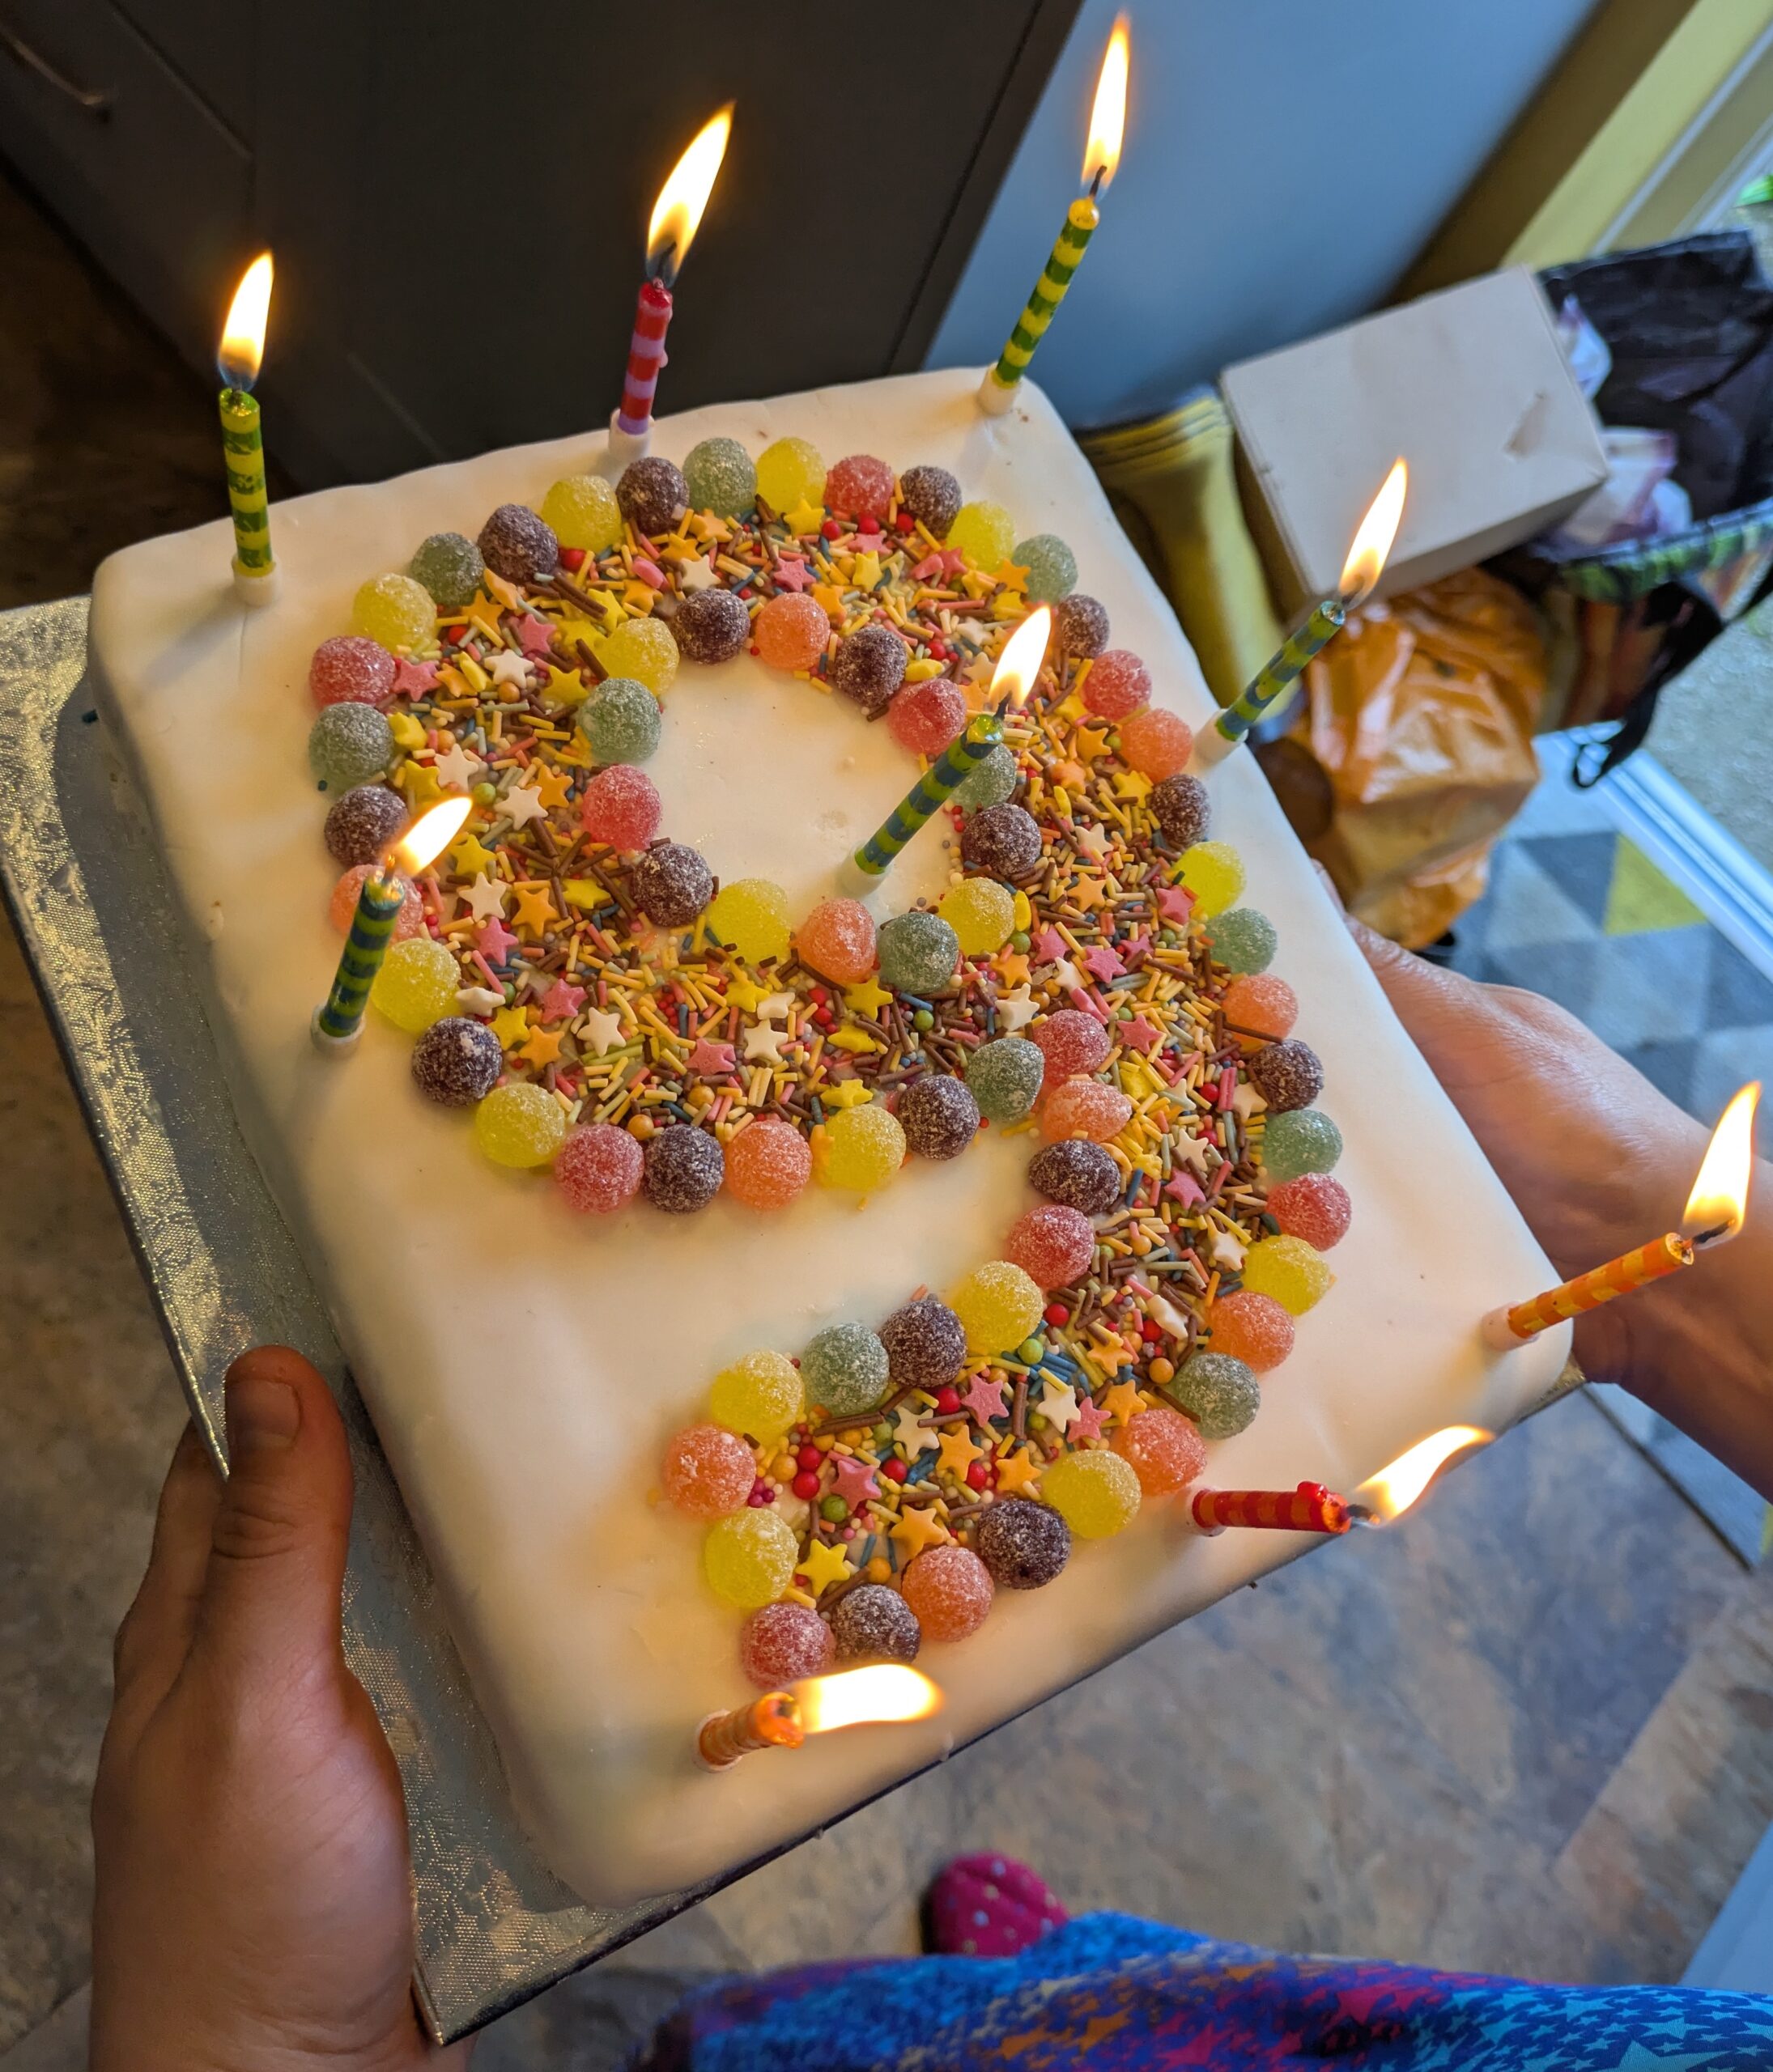
How to decorate a simple but effective child’s birthday cake
Welcome to anyone coming here from April Cools! I usually blog about things like cool geospatial tools, books I’ve read, Python packages I’ve created and more. But today, time for something different…
I quite like making decorated birthday cakes (I’ll show some of my favourites at the end of this post), but they generally take quite a lot of time and effort to make. My son doesn’t really like cake – he prefers biscuits – so I tend to make some decorated biscuits for his actual birthday, and then a simply decorated birthday cake for his party.
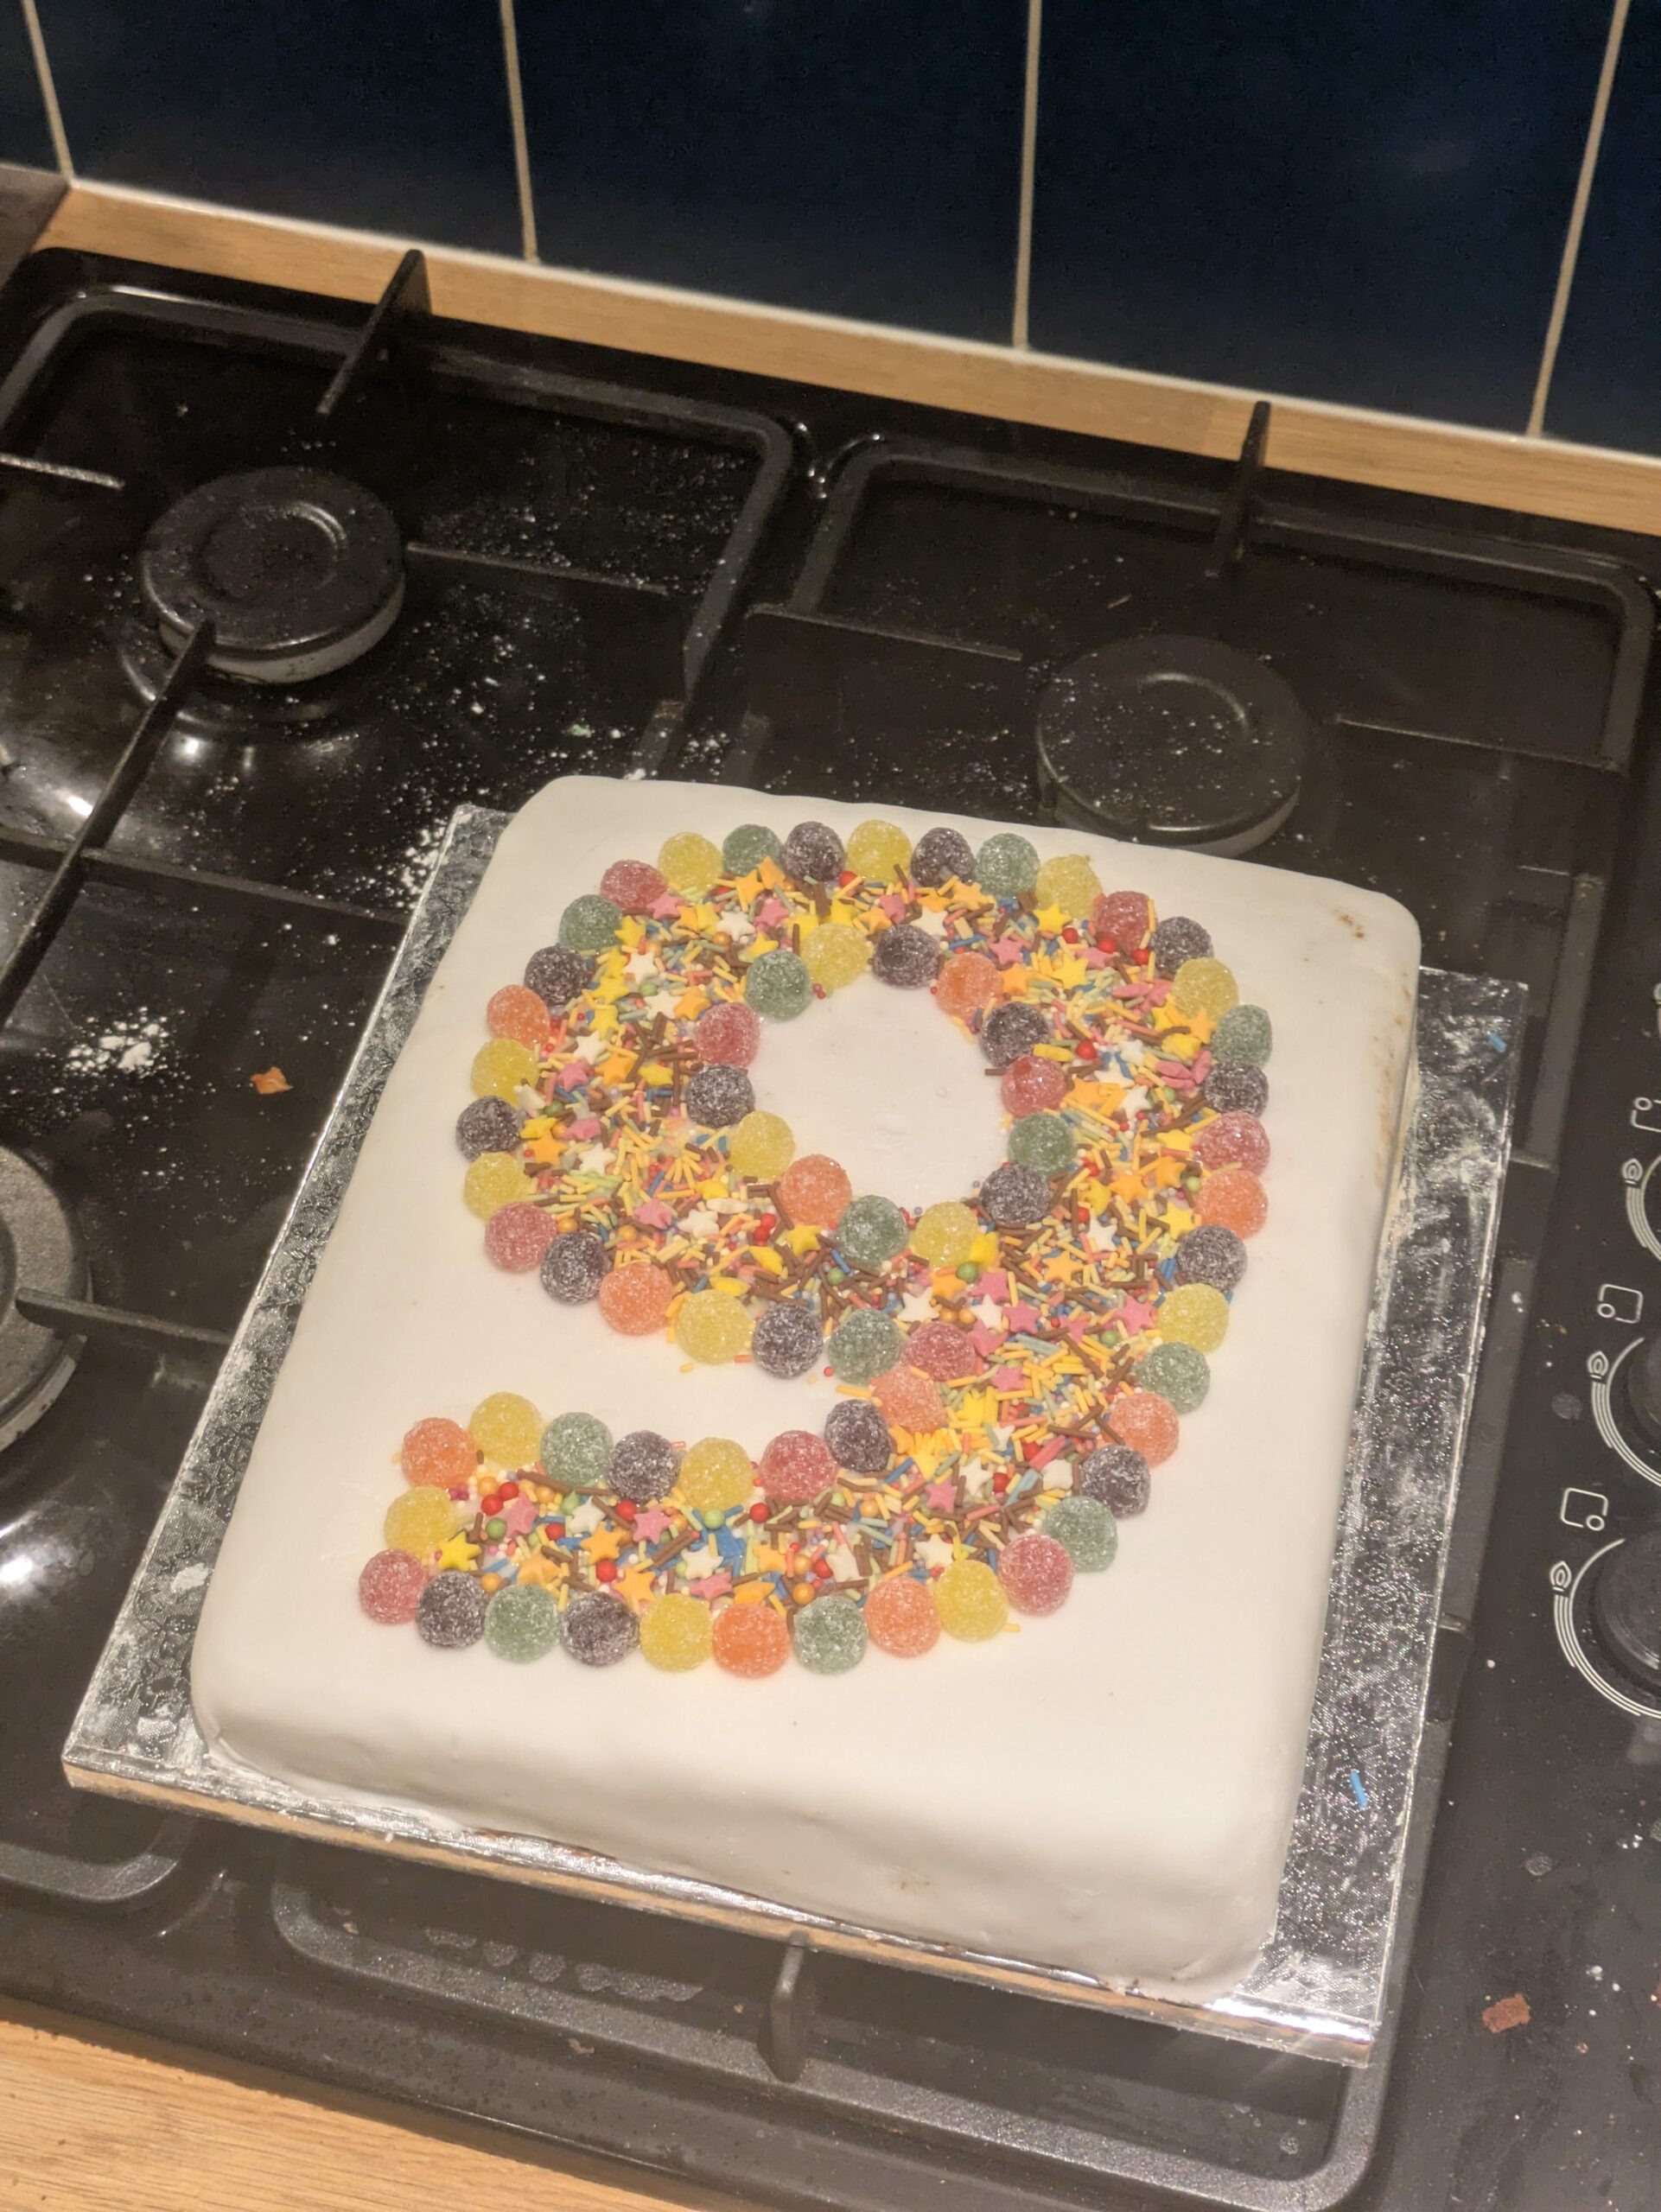
I’ve done the same style of decoration for nearly all of his parties, and I repeated it again for his 9th birthday this year. I’ve had quite a few compliments about it, so thought I’d write a tutorial on how to create it.
The result of these instructions will be a cake like the picture above – a cake flat-iced with roll-out icing with a number outlined on the top. It is fairly simple to make, but it’s useful to know a few tricks to make it easier. You can click on any of the pictures below to make them bigger. So, let’s get started:
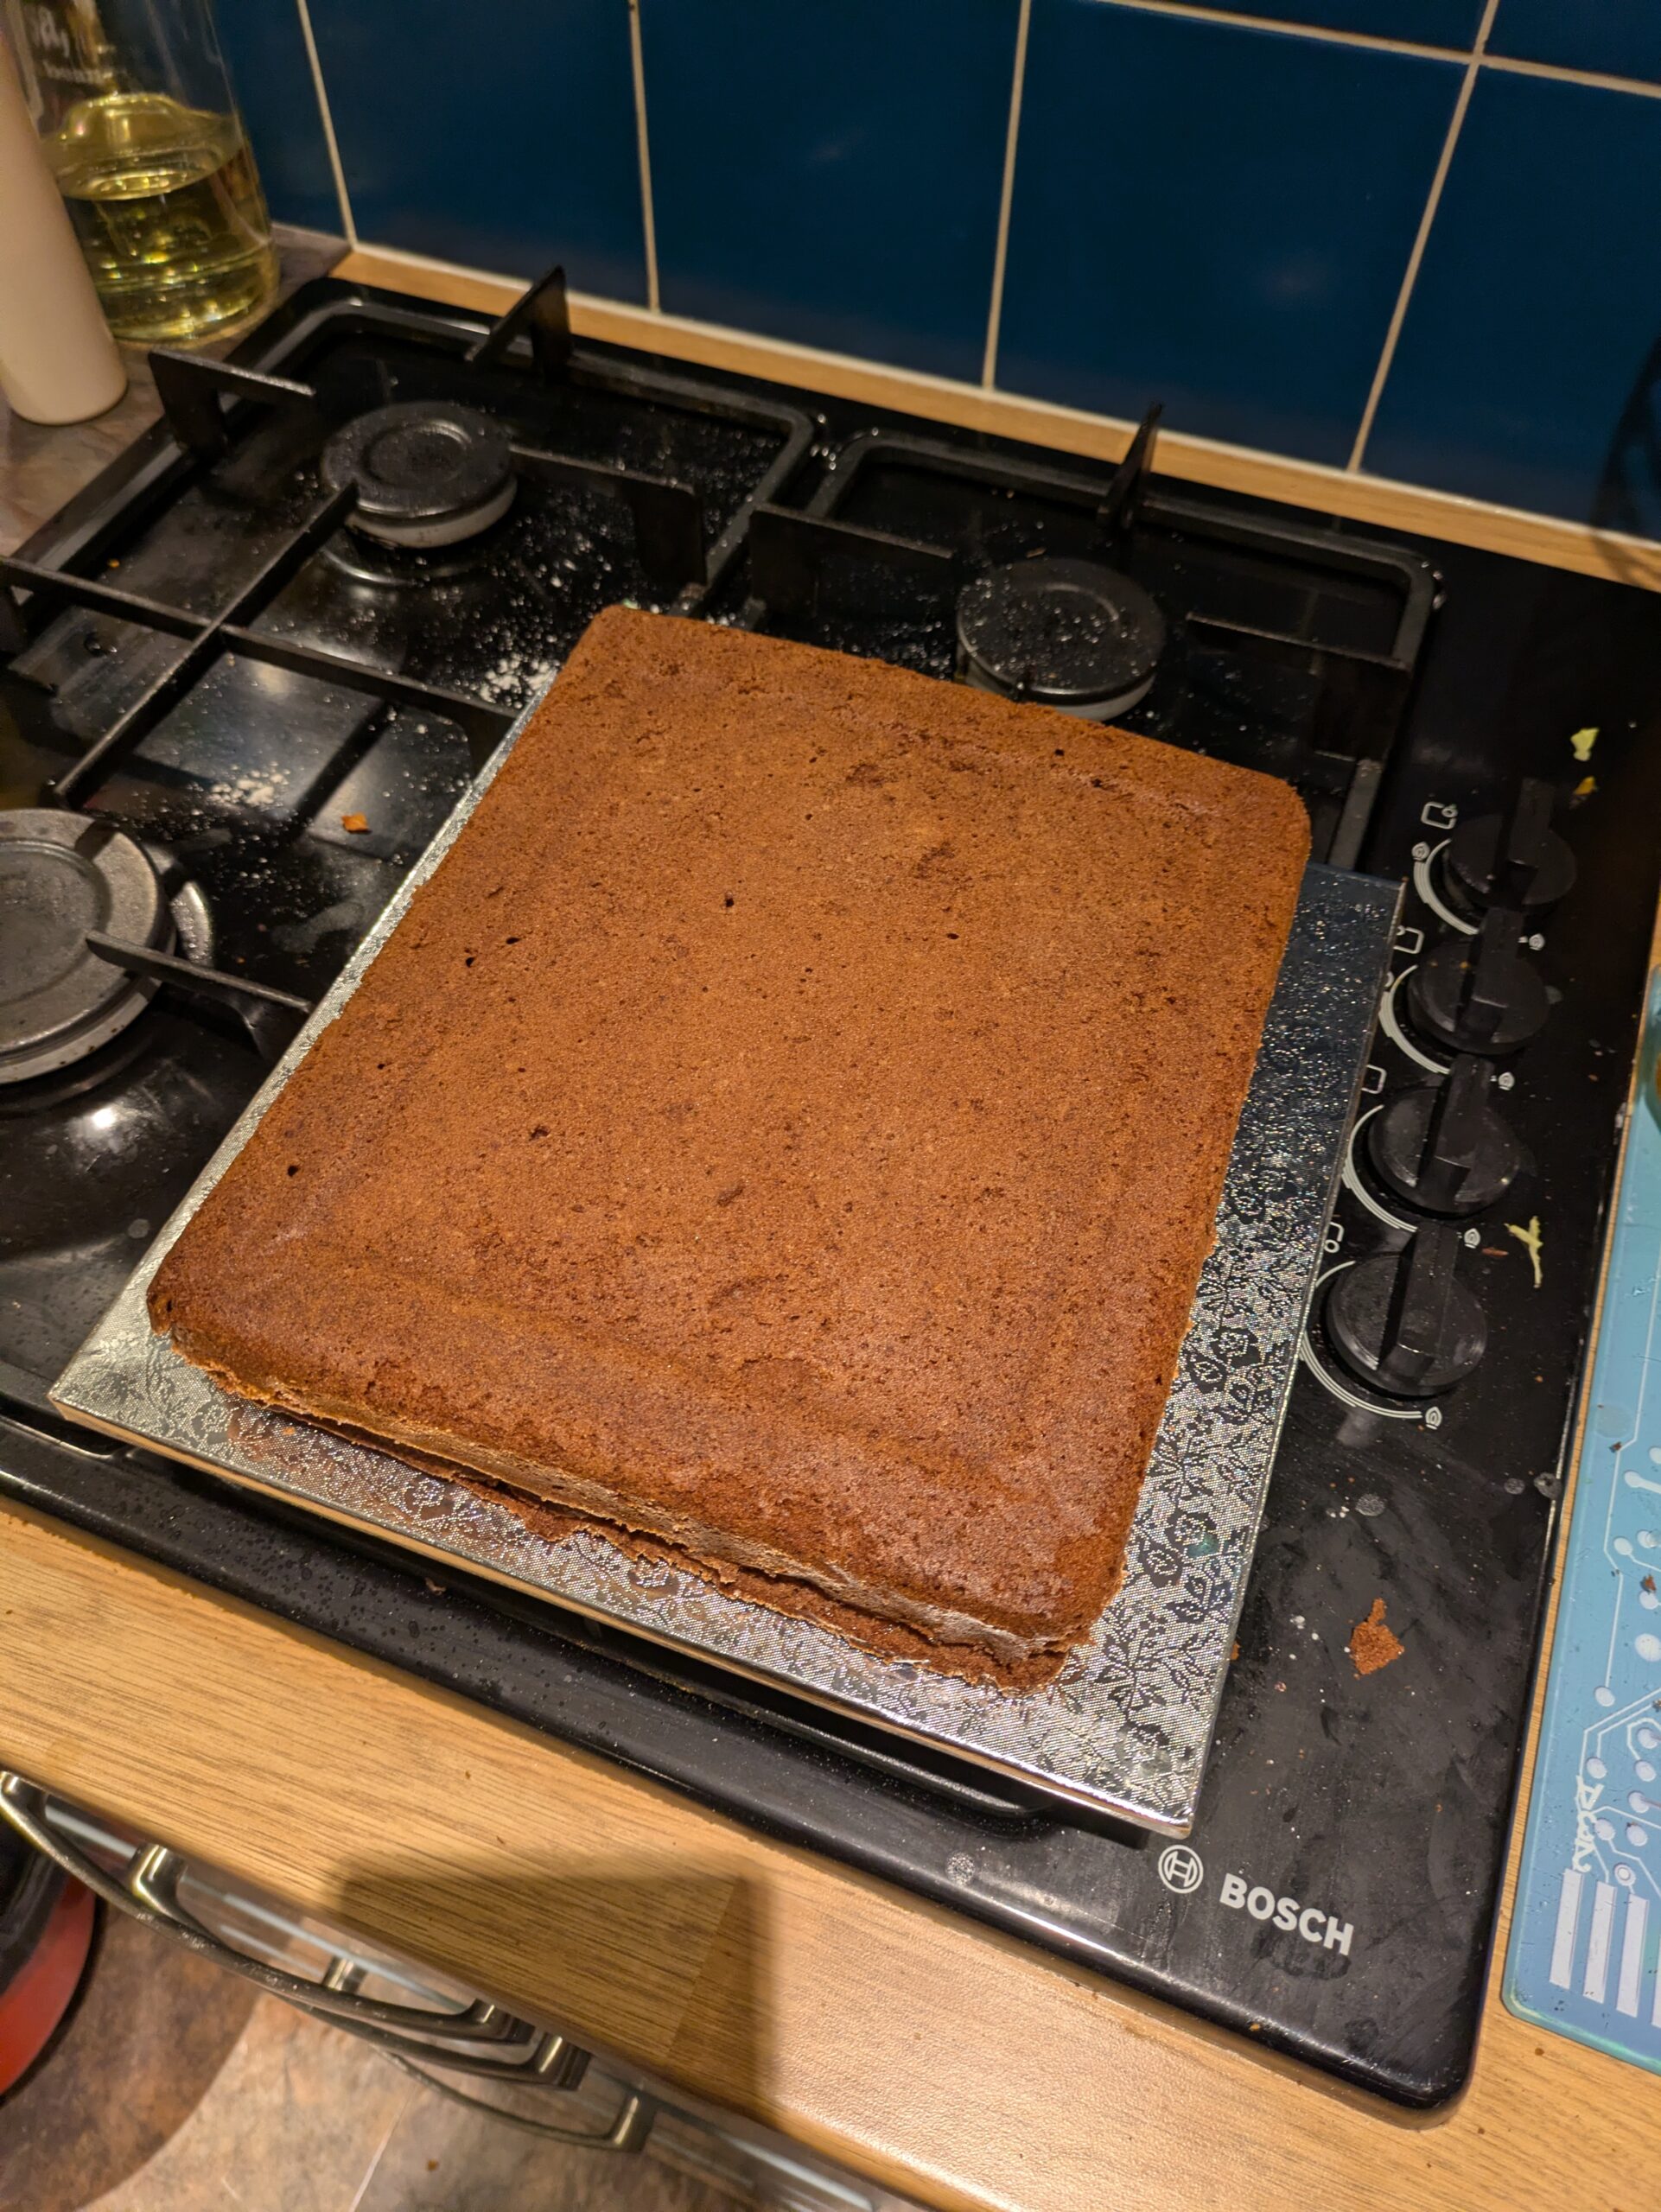
Step 1:
Bake a cake (it’s like ‘First catch your rabbit’ isn’t it?). I won’t give you instructions on how to bake a cake, as it’ll depend on what sort of cake you want (I had to make mine gluten free). Bake it in a low, large-ish pan – you’re aiming for a cake that is roughly the size of an A4 (or Letter) piece of paper, maybe a little smaller. Once baked, trim the cake to make the edges flat and square.
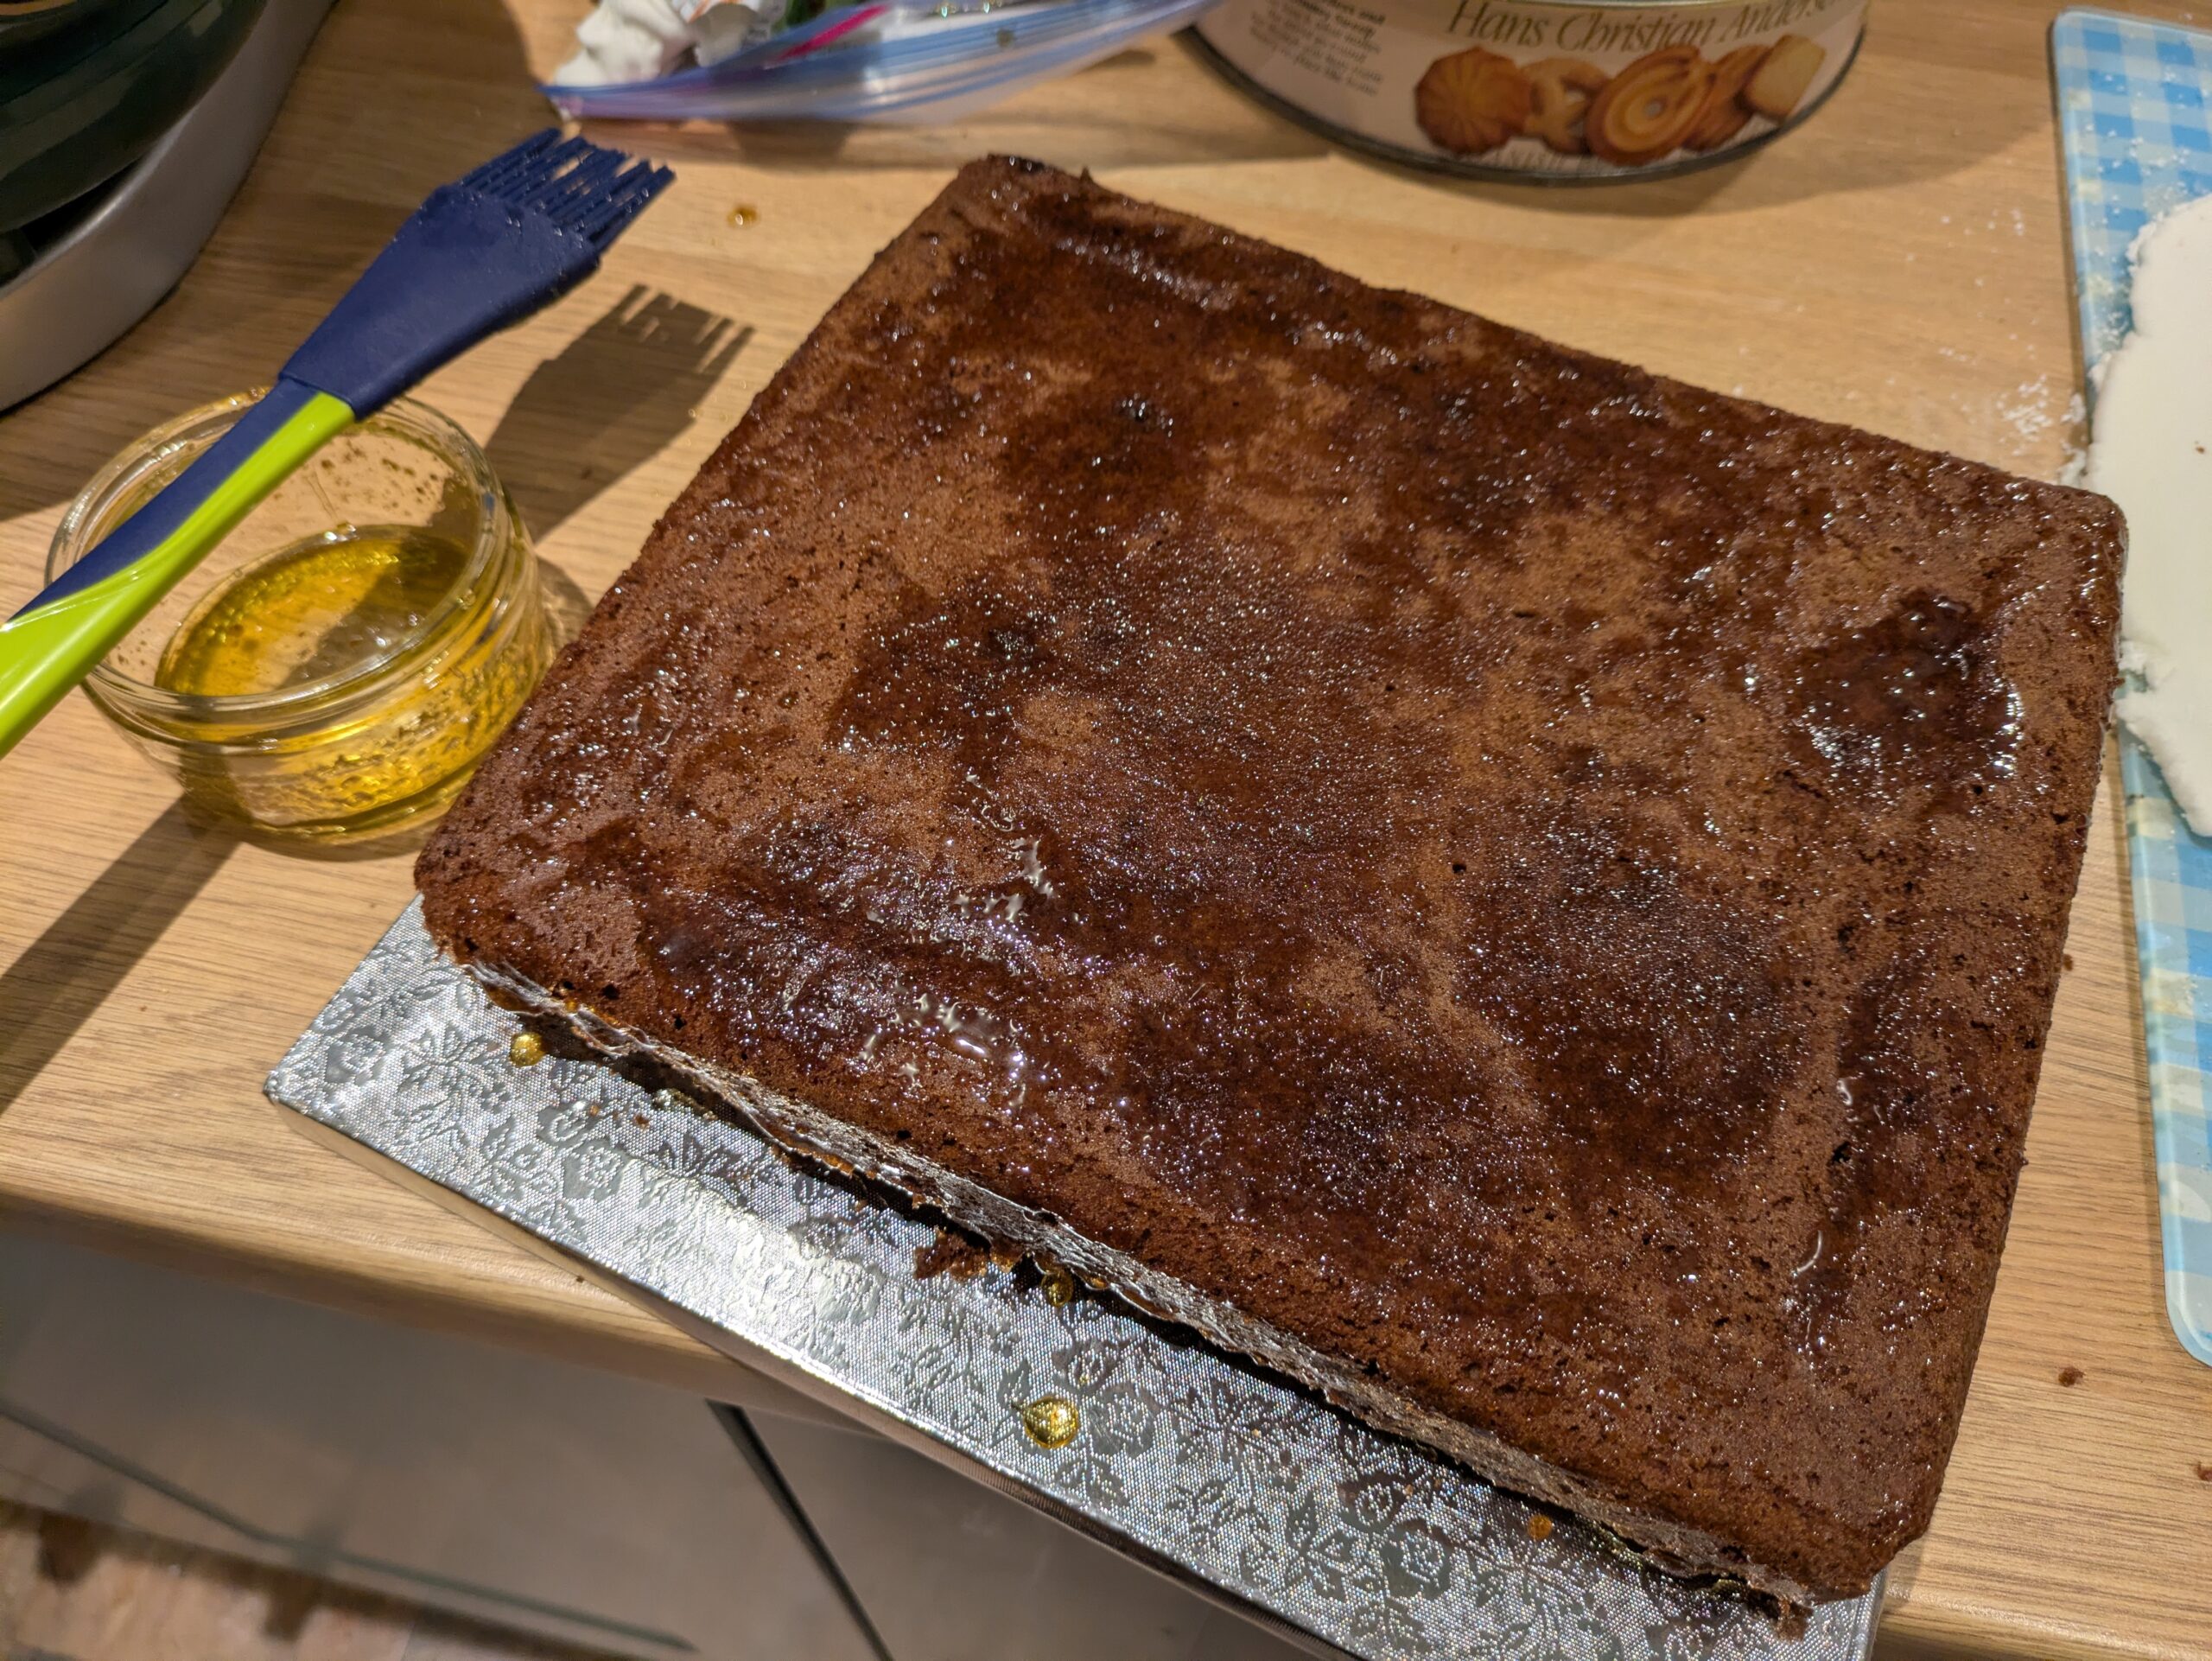
Step 2:
Cover the cake in something to help the roll-out icing stick. I used Golden Syrup that I’d put in the microwave for 30s to make it a more easily spreadable consistency, but you could also use jam (seedless/smooth varieties work best).
Step 3:
Roll out the icing until it’s large enough to cover the top and sides of the cake. Pick it up carefully and place it over the cake. Smooth it down to get it nice and flat – you can do this by hand or use a cake smoothing tool like shown in the photo.

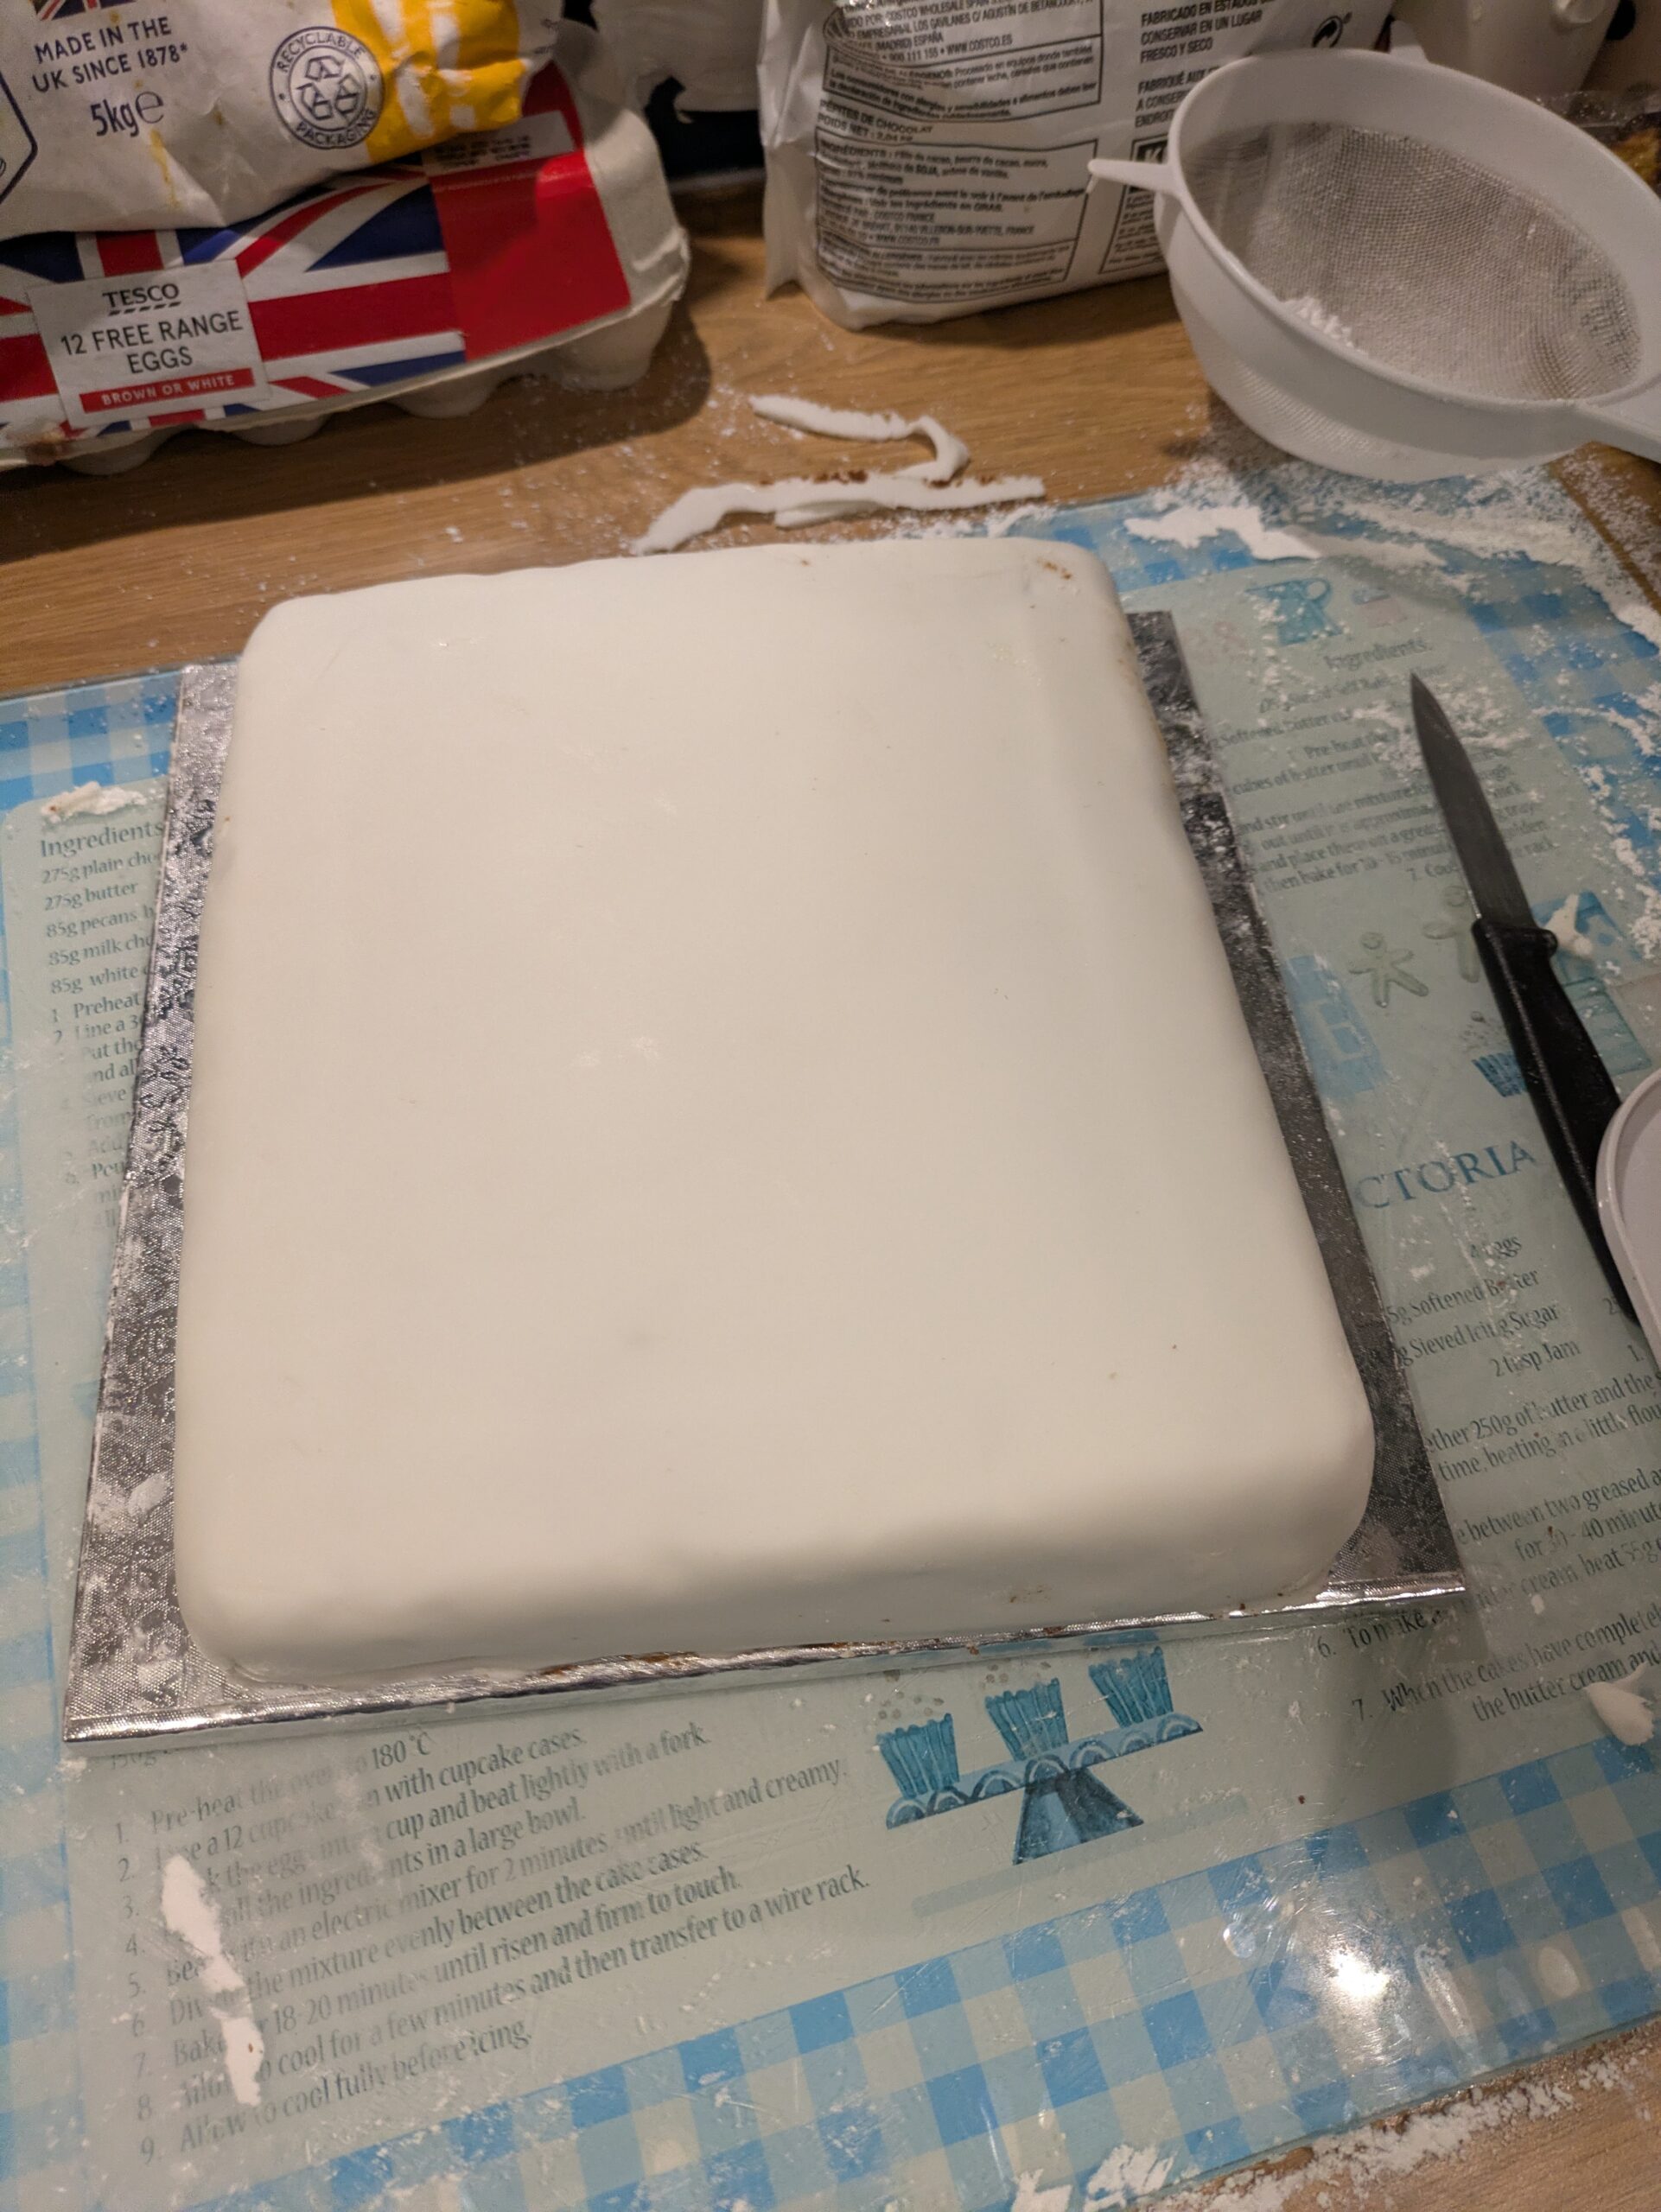
Step 4:
Cut the excess off the edges, smooth the edges too and tidy up any little mistakes you made (I had to do quite a bit of this, as I rolled it out a bit too thinly). If you need to add more icing to cover up a hole then roll out a bit, push it over the hole and then keep stroking it gently with your finger to make it blend into its surroundings. You should end up with a nice, flat, simply iced cake. Of course, I’ve used white icing here, but you could use any colour – either buy coloured icing, or knead in some colouring paste before rolling it out.
Step 5:
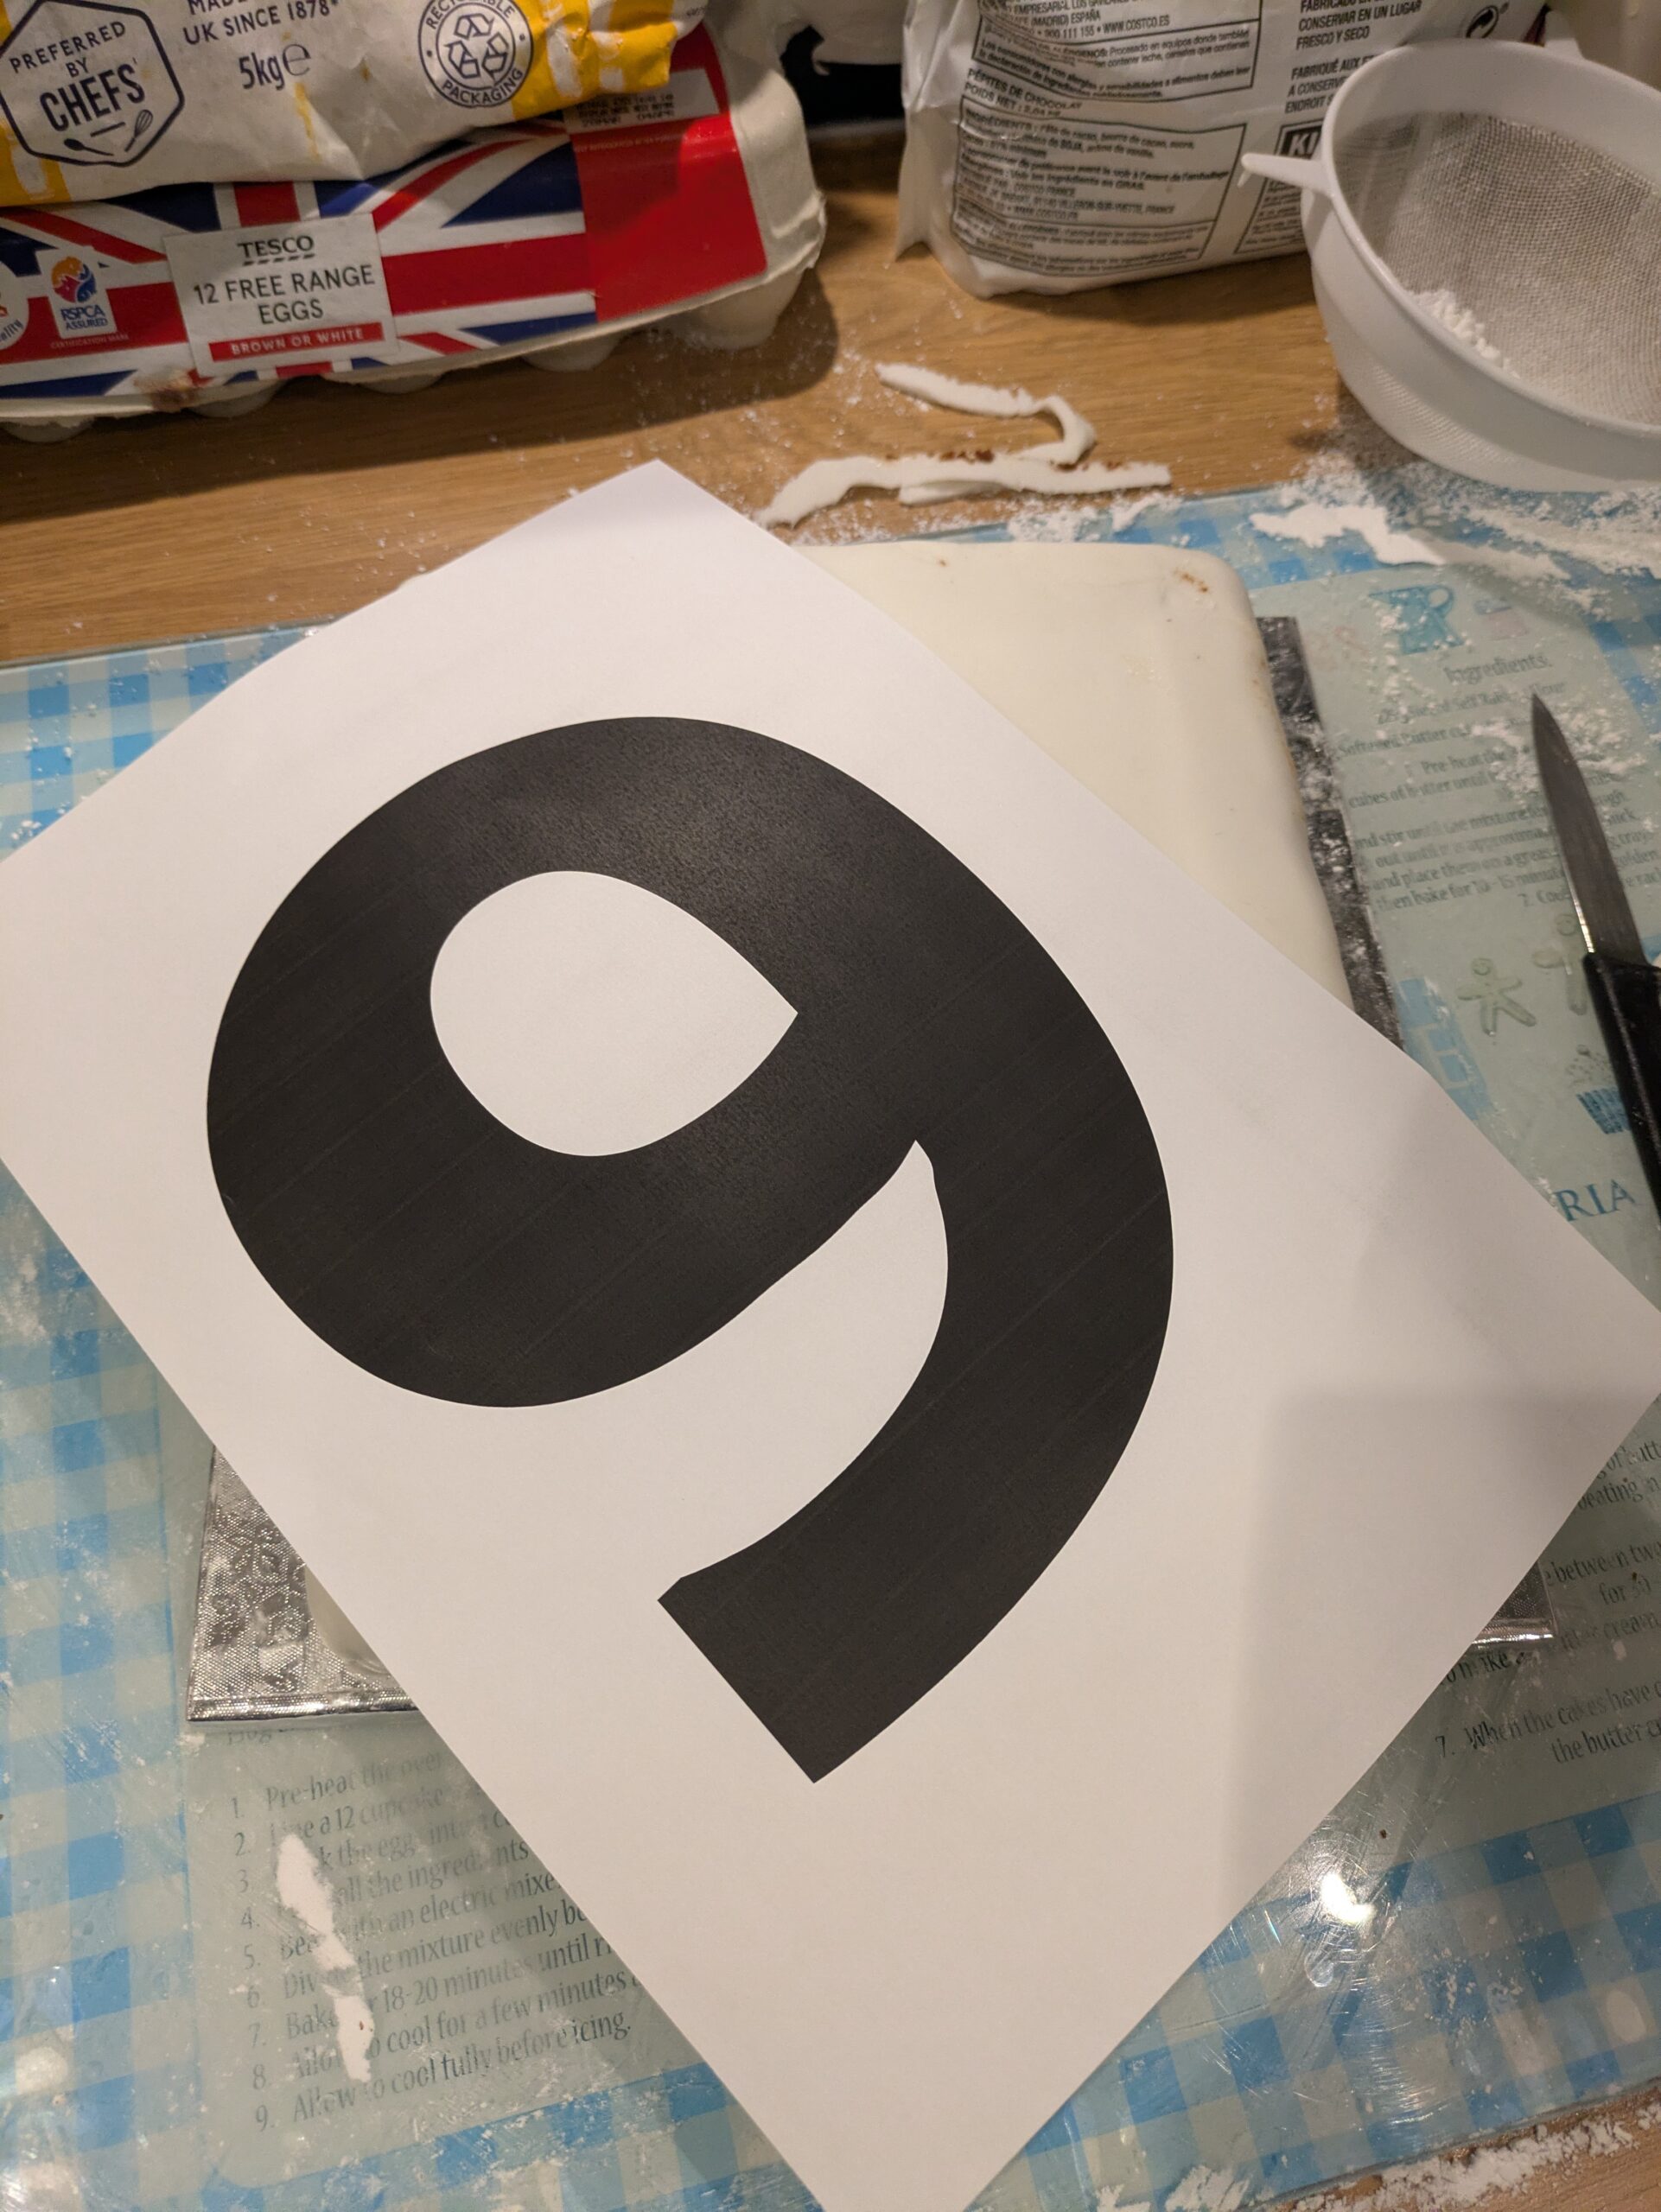
Measure the size of the top of the cake and use a computer to create a number that will fit on the cake. You could do this in all sorts of software – Word or Powerpoint will work, so will Inkscape, or anything similar. I find that the Arial Black font works for fairly bold numbers, but feel free to experiment. If you’re using a vector editing tool like Inkscape you can convert the text to a vector object and then edit the individual vertices if you want to change the design at all. Of course you can do this with any bold object you can print out – it doesn’t have to be a number. Print it out.
Step 6:
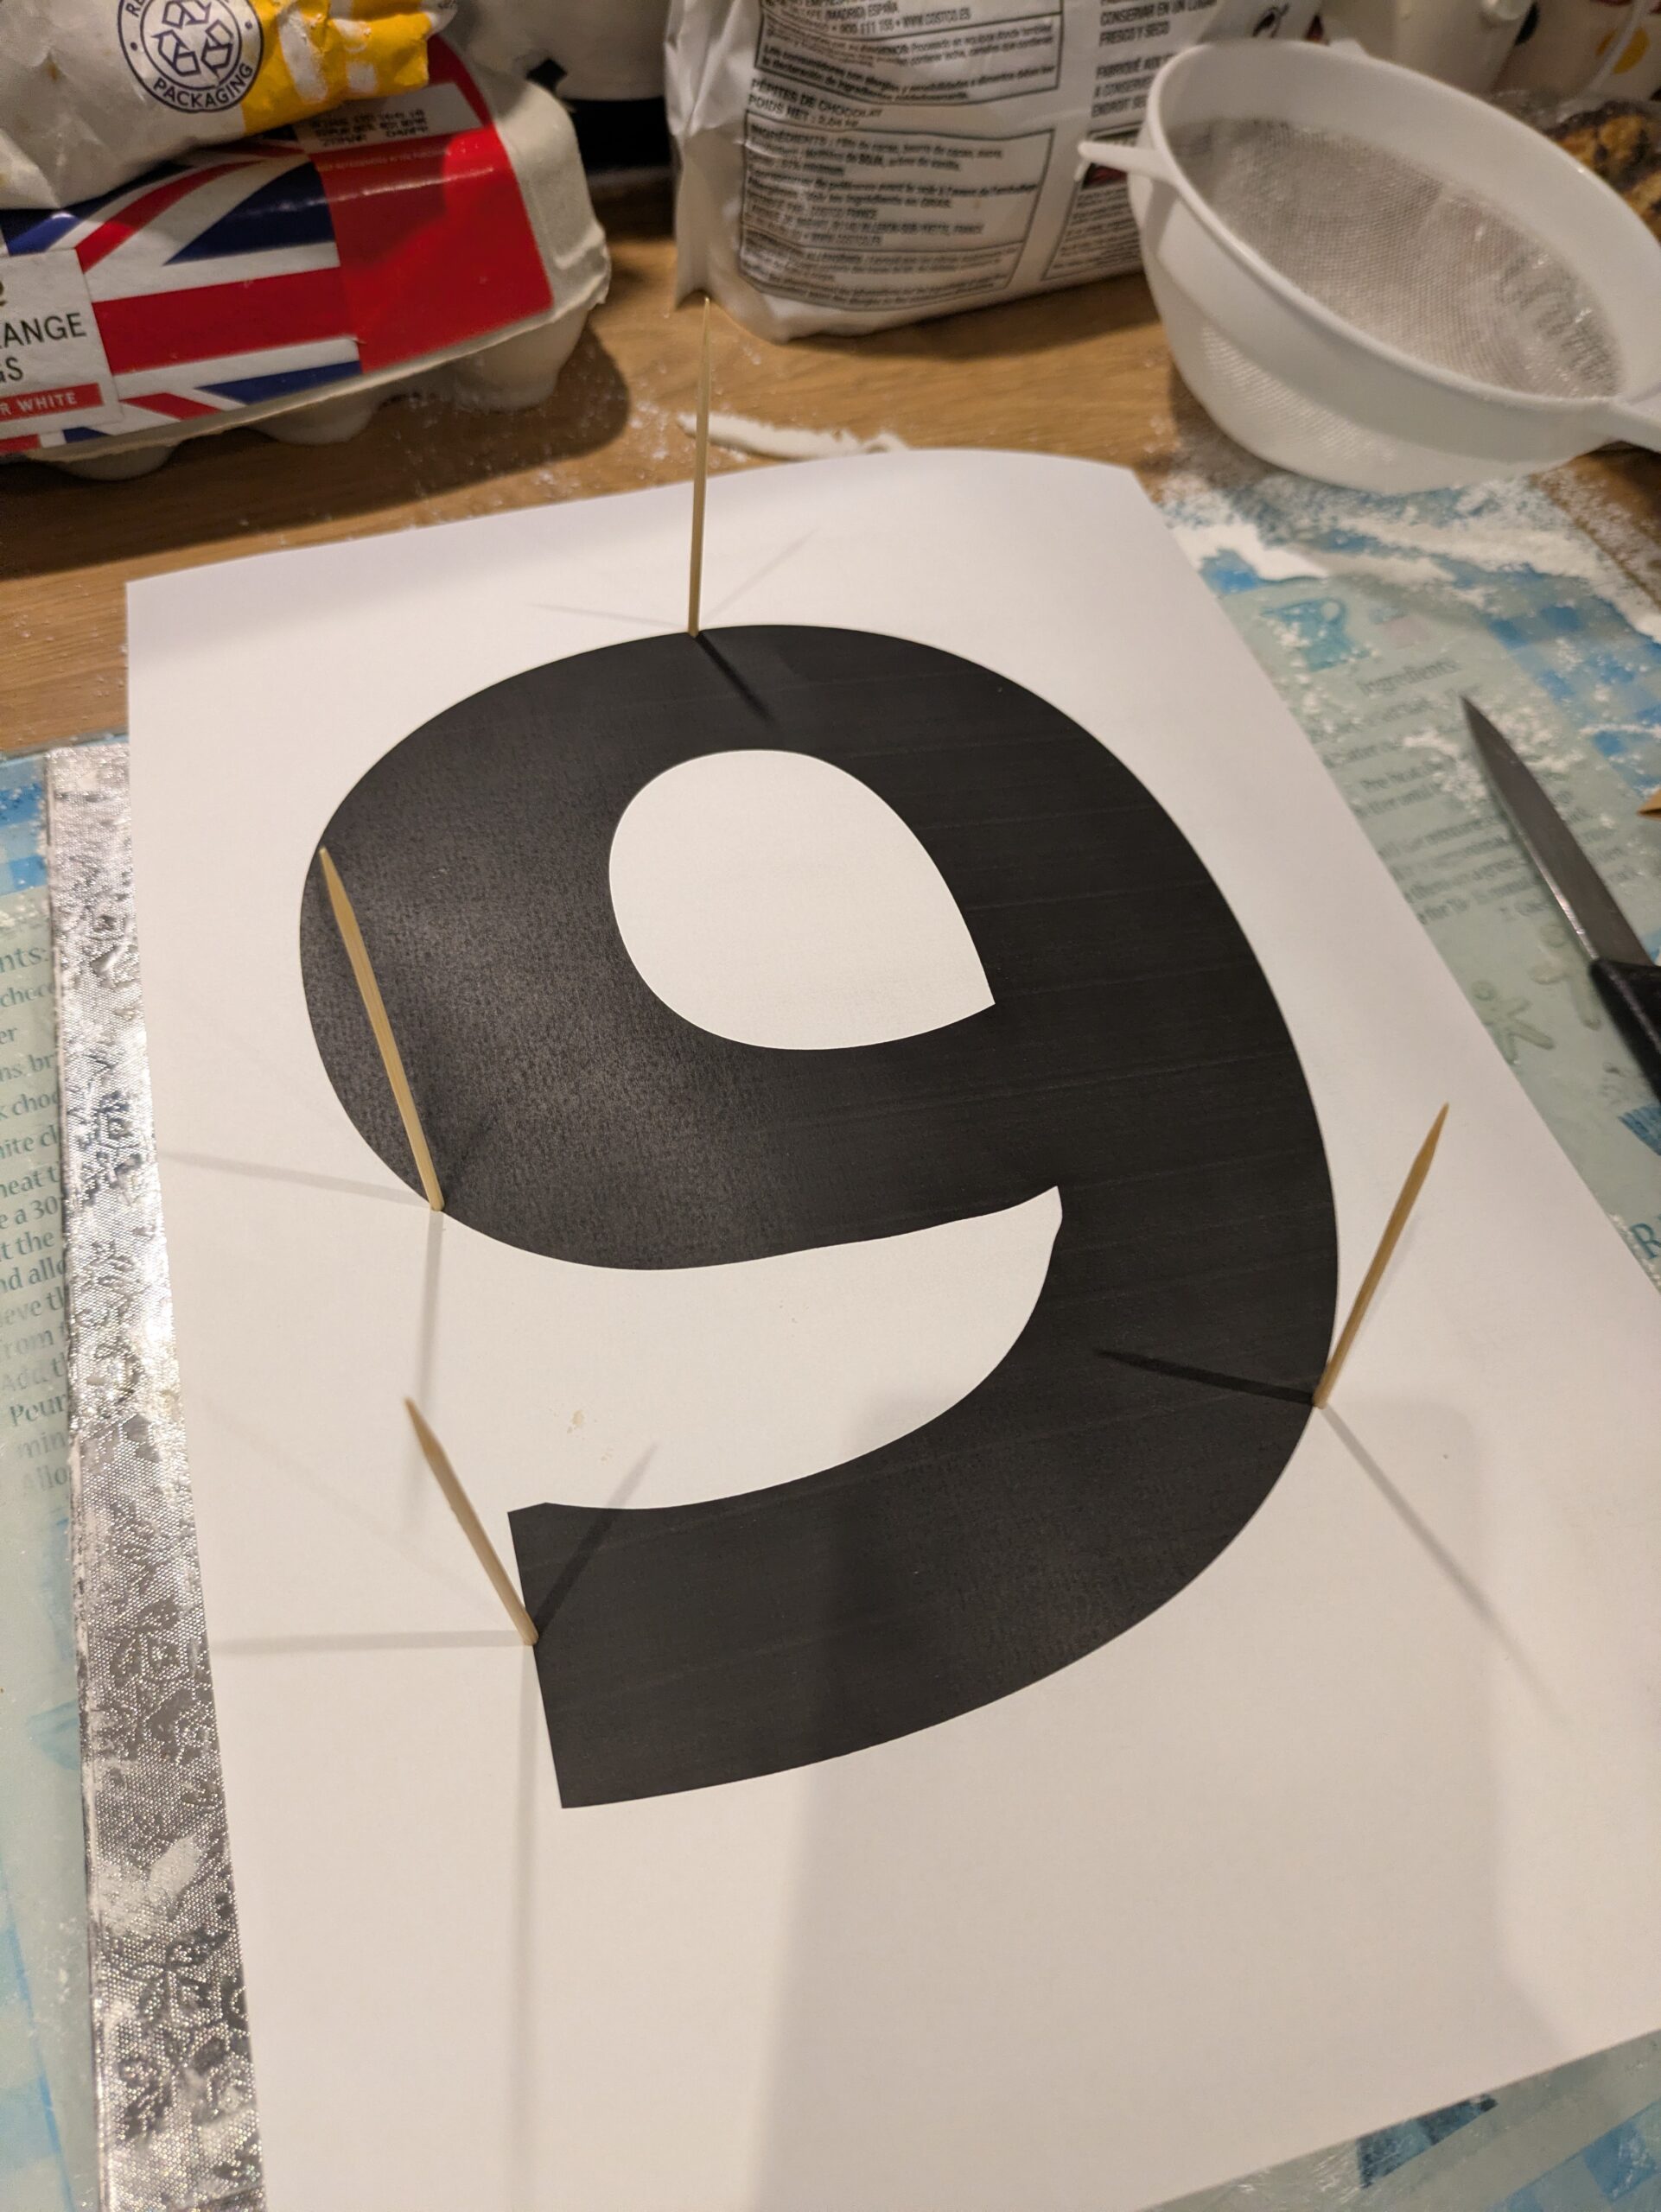
Line up the number on the top of the cake and poke some cocktail sticks through the paper and into the icing and cake to hold it in the right place. Make sure these cocktail sticks are somewhere around the border of the shape.
Step 7:
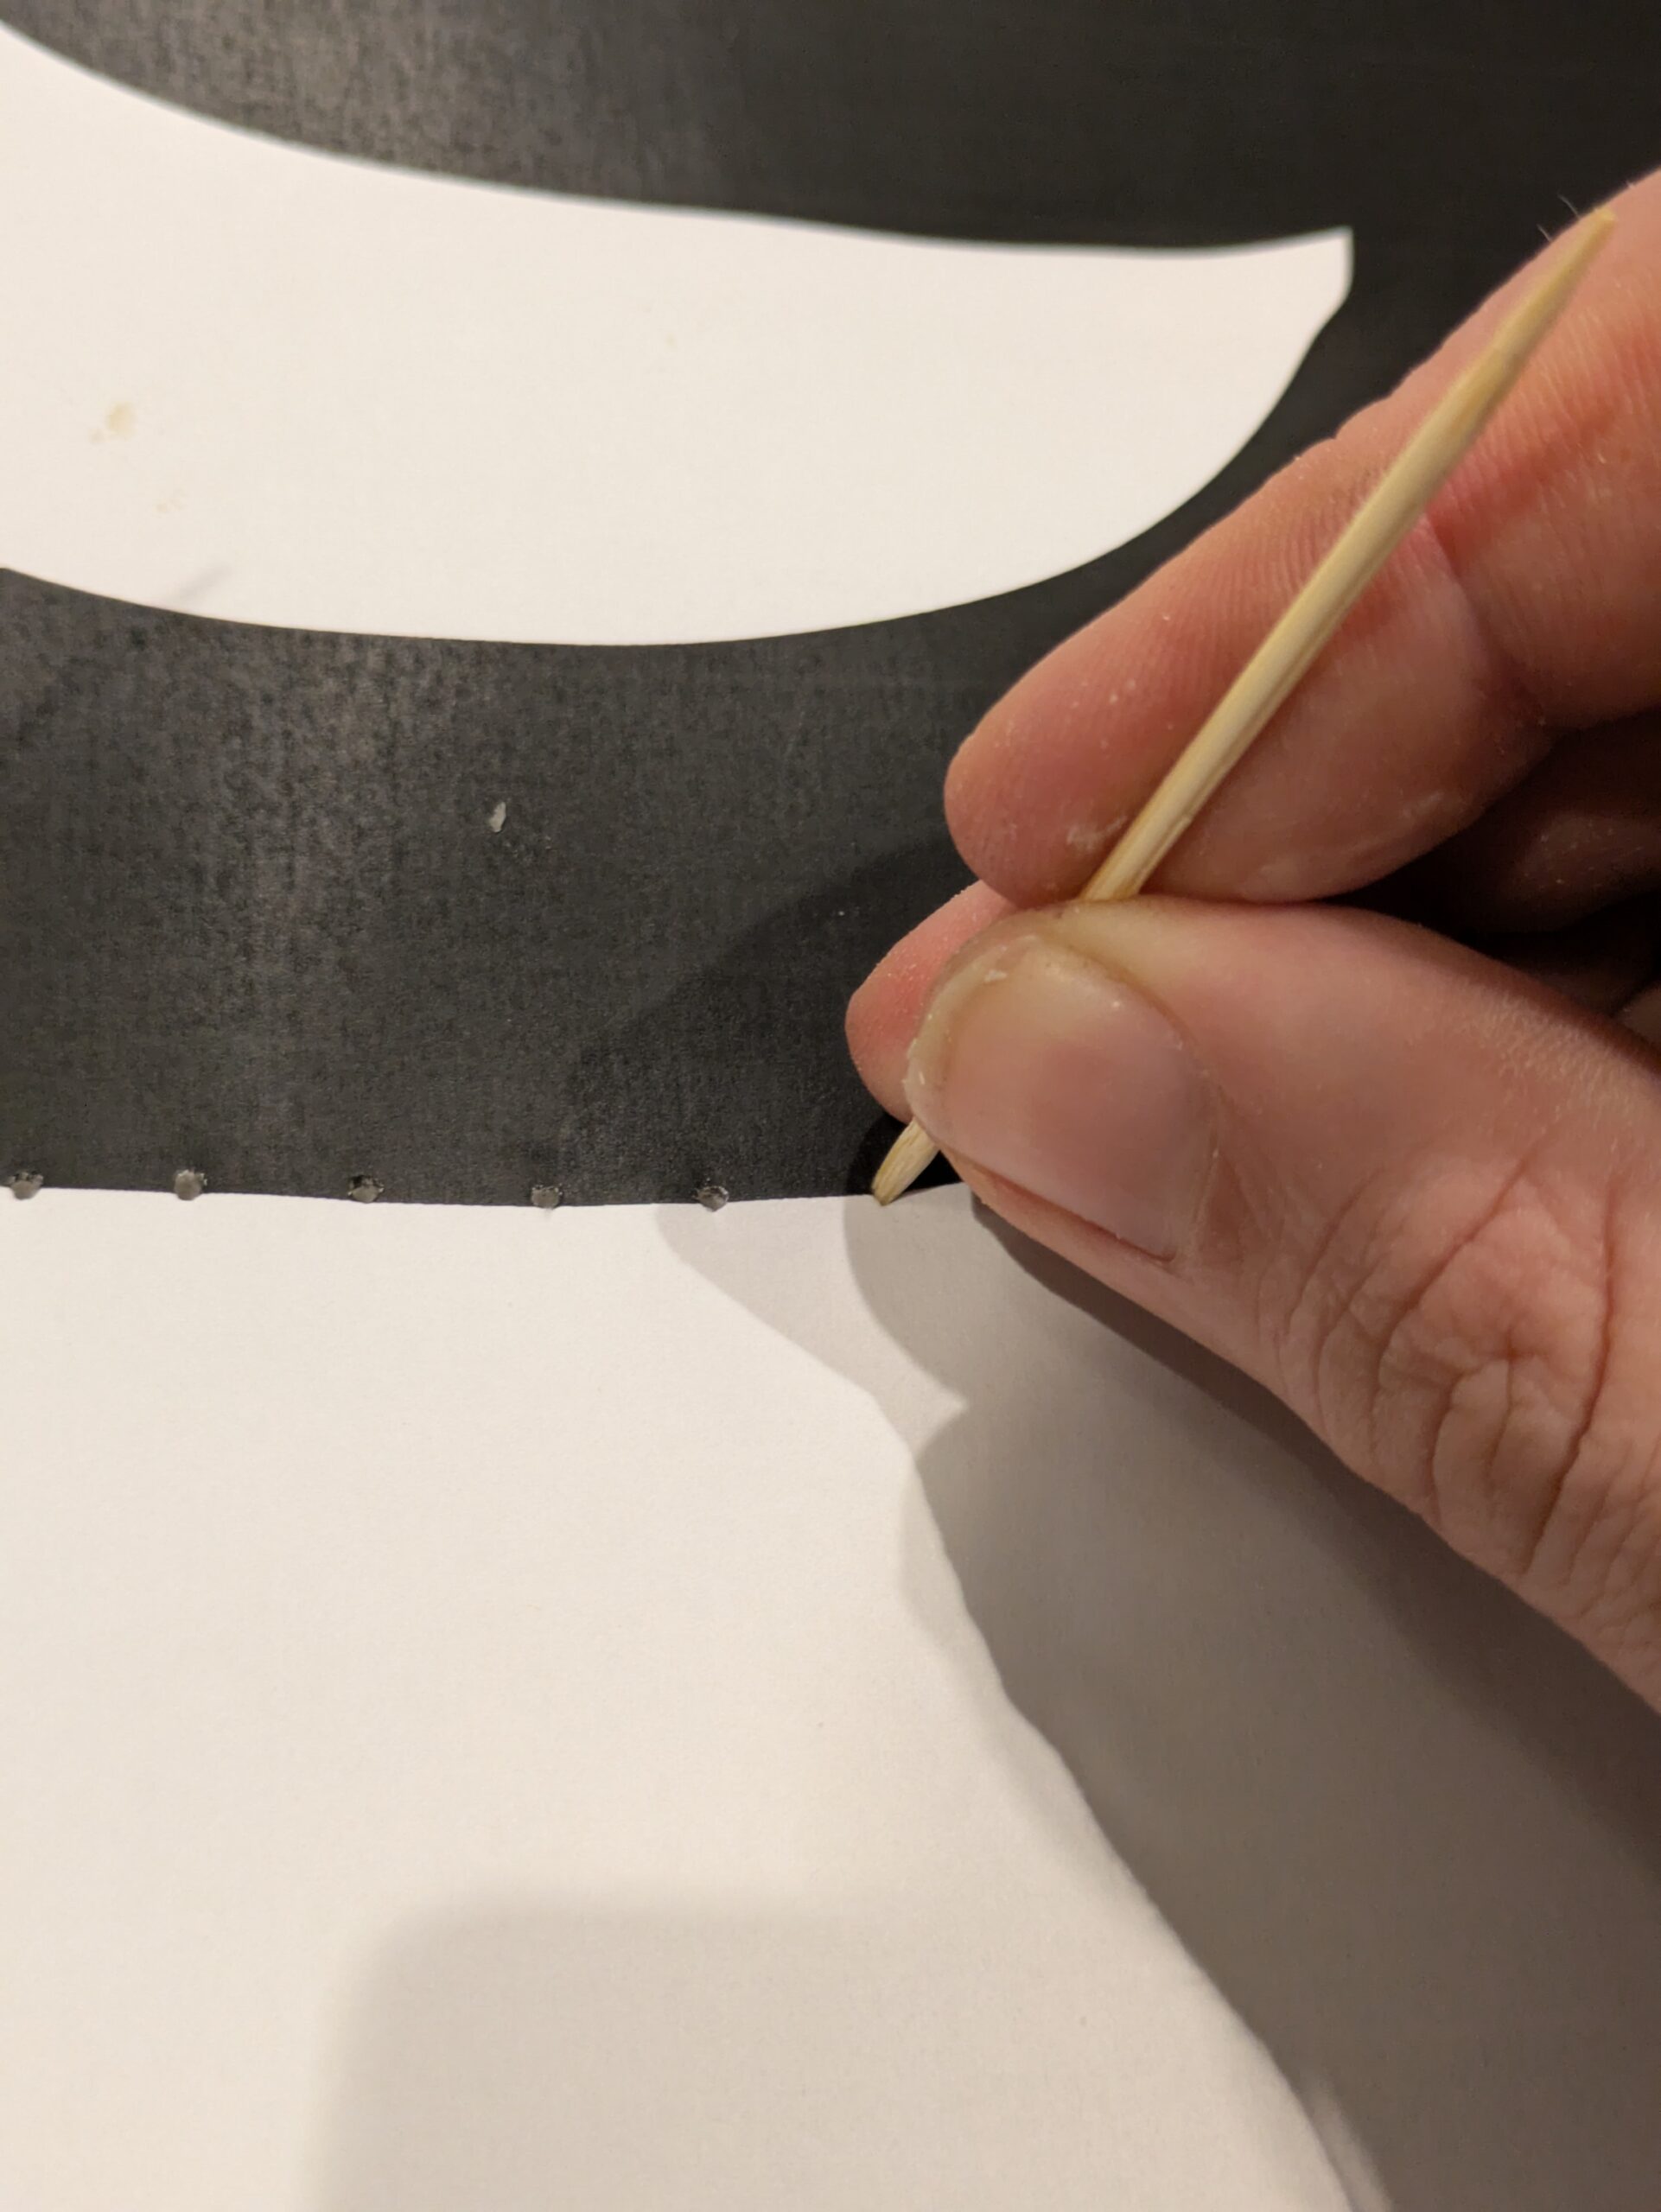
Use another cocktail stick to poke through the paper and into the icing, making little holes following the edge of the shape.
Step 8:
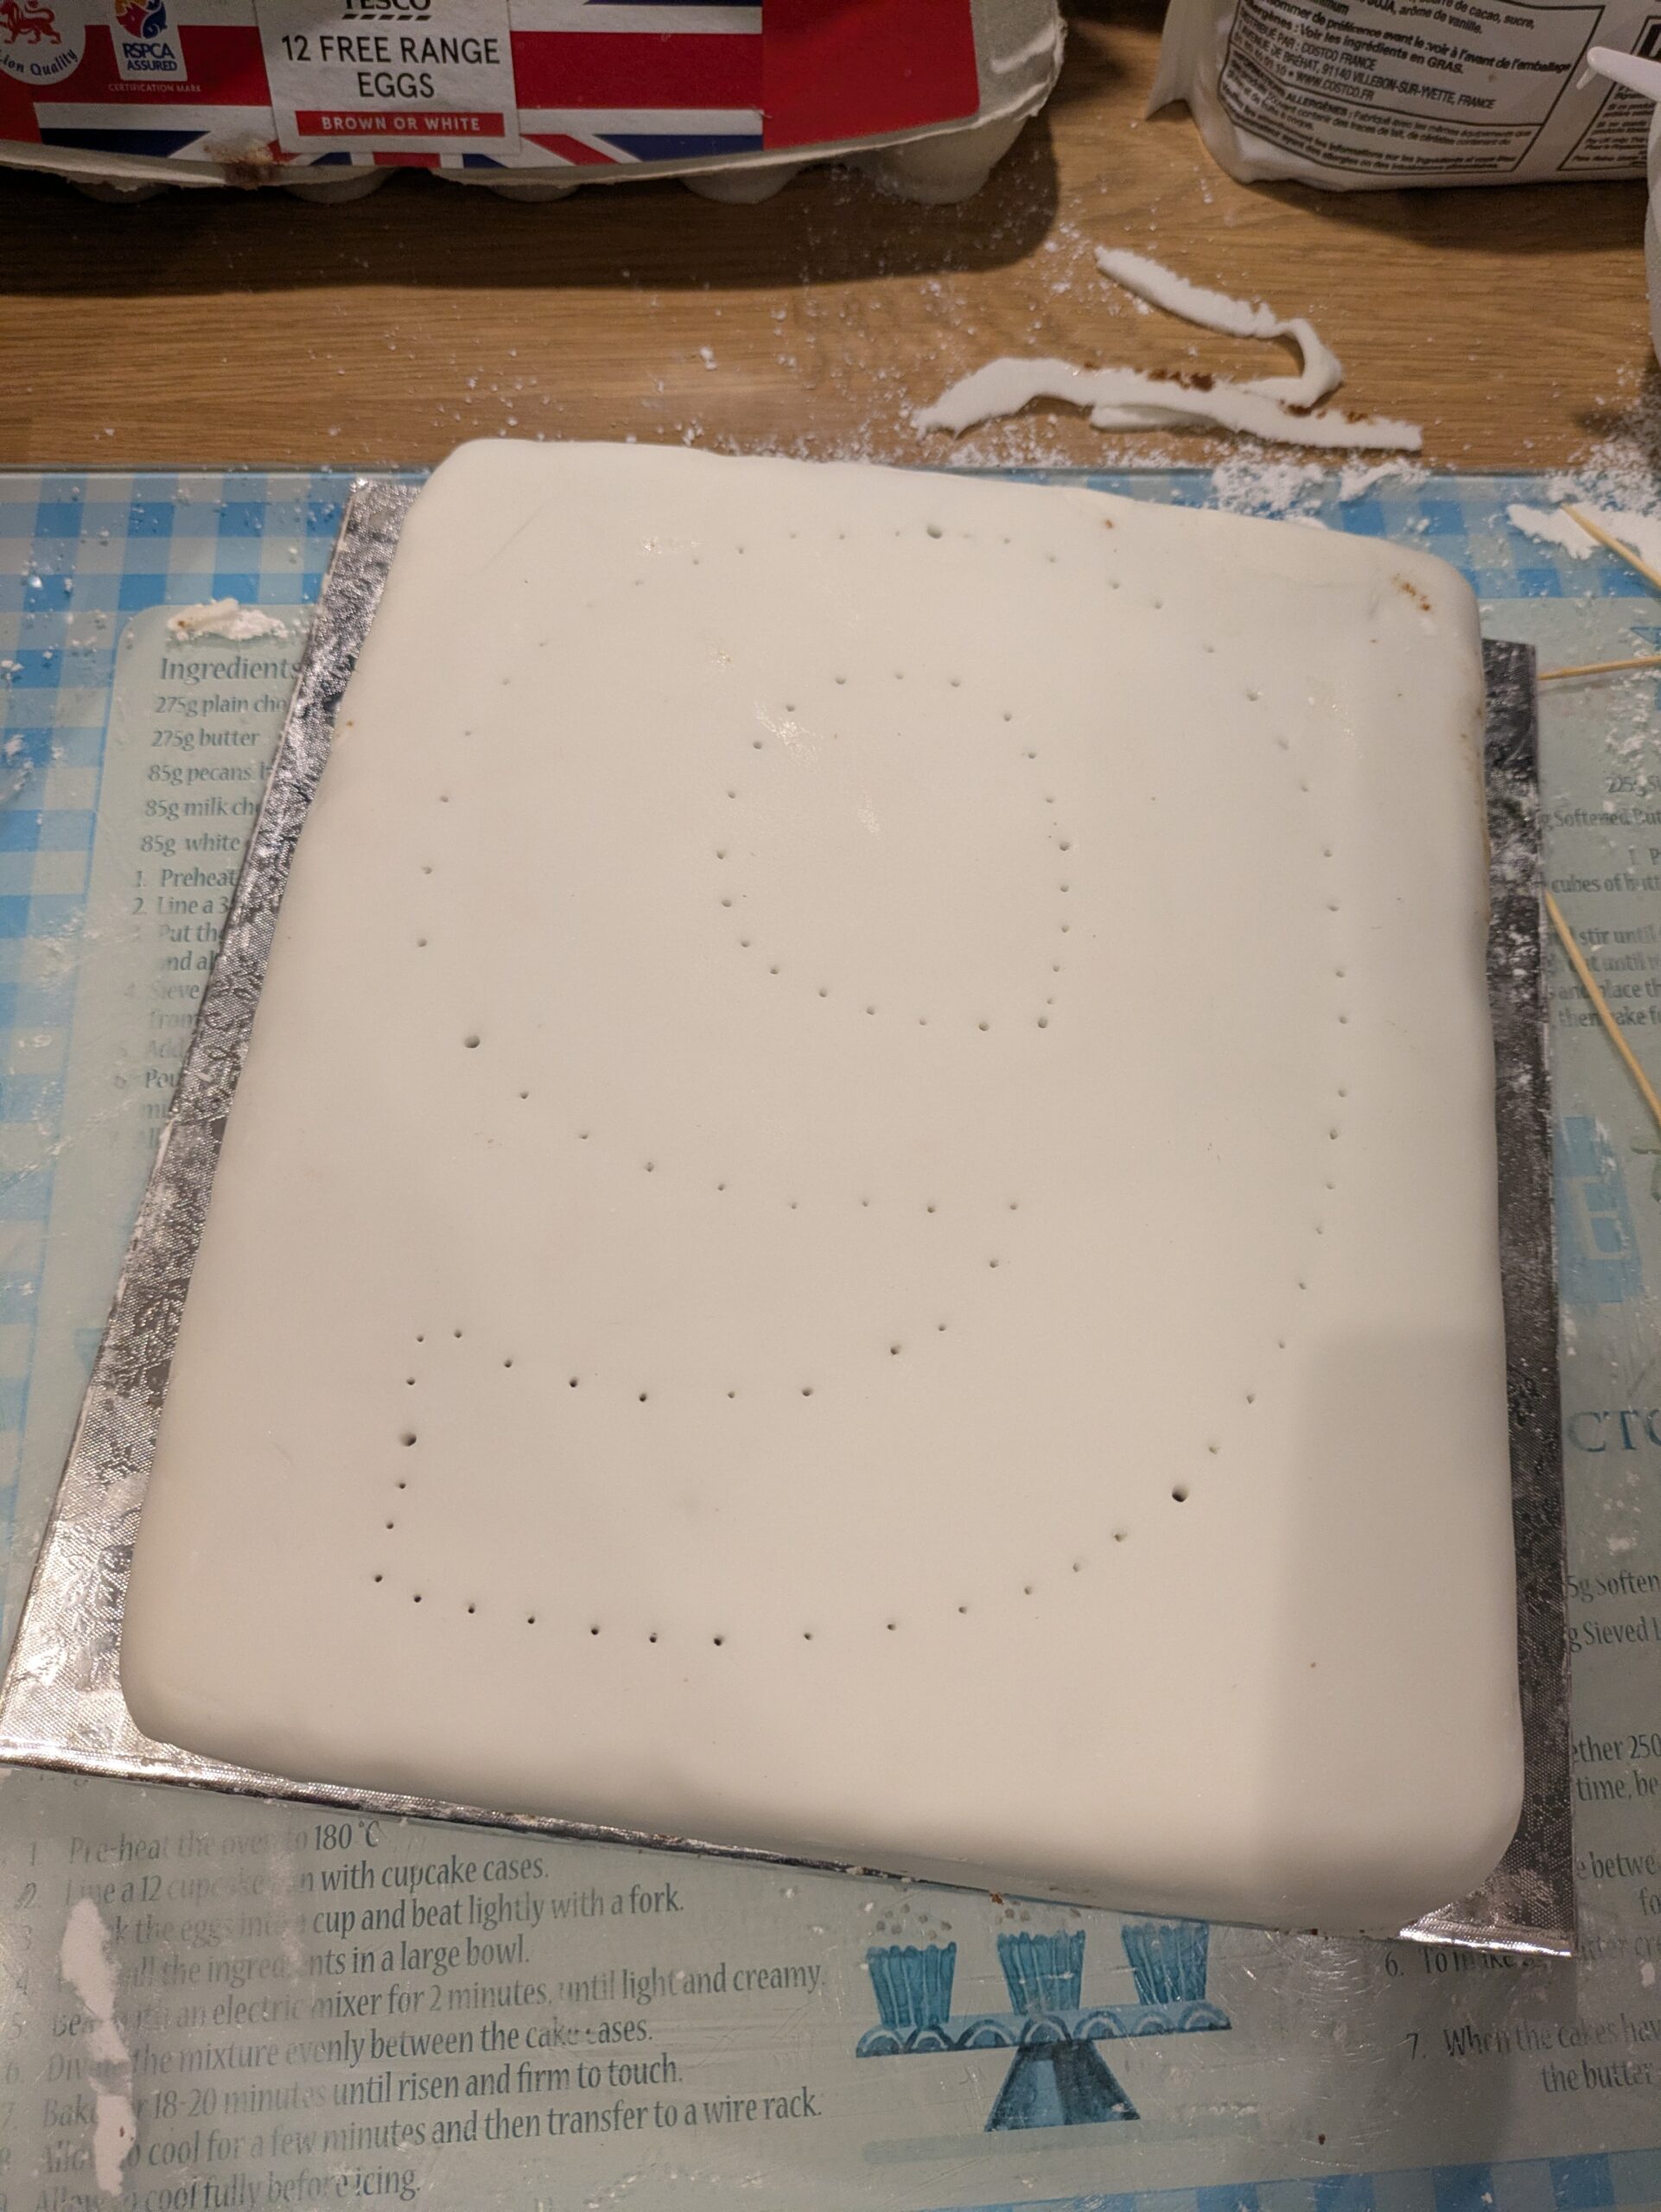
Remove the cocktail sticks and take the paper off. You should find you have a nice pricked outline for the edge of the shape.
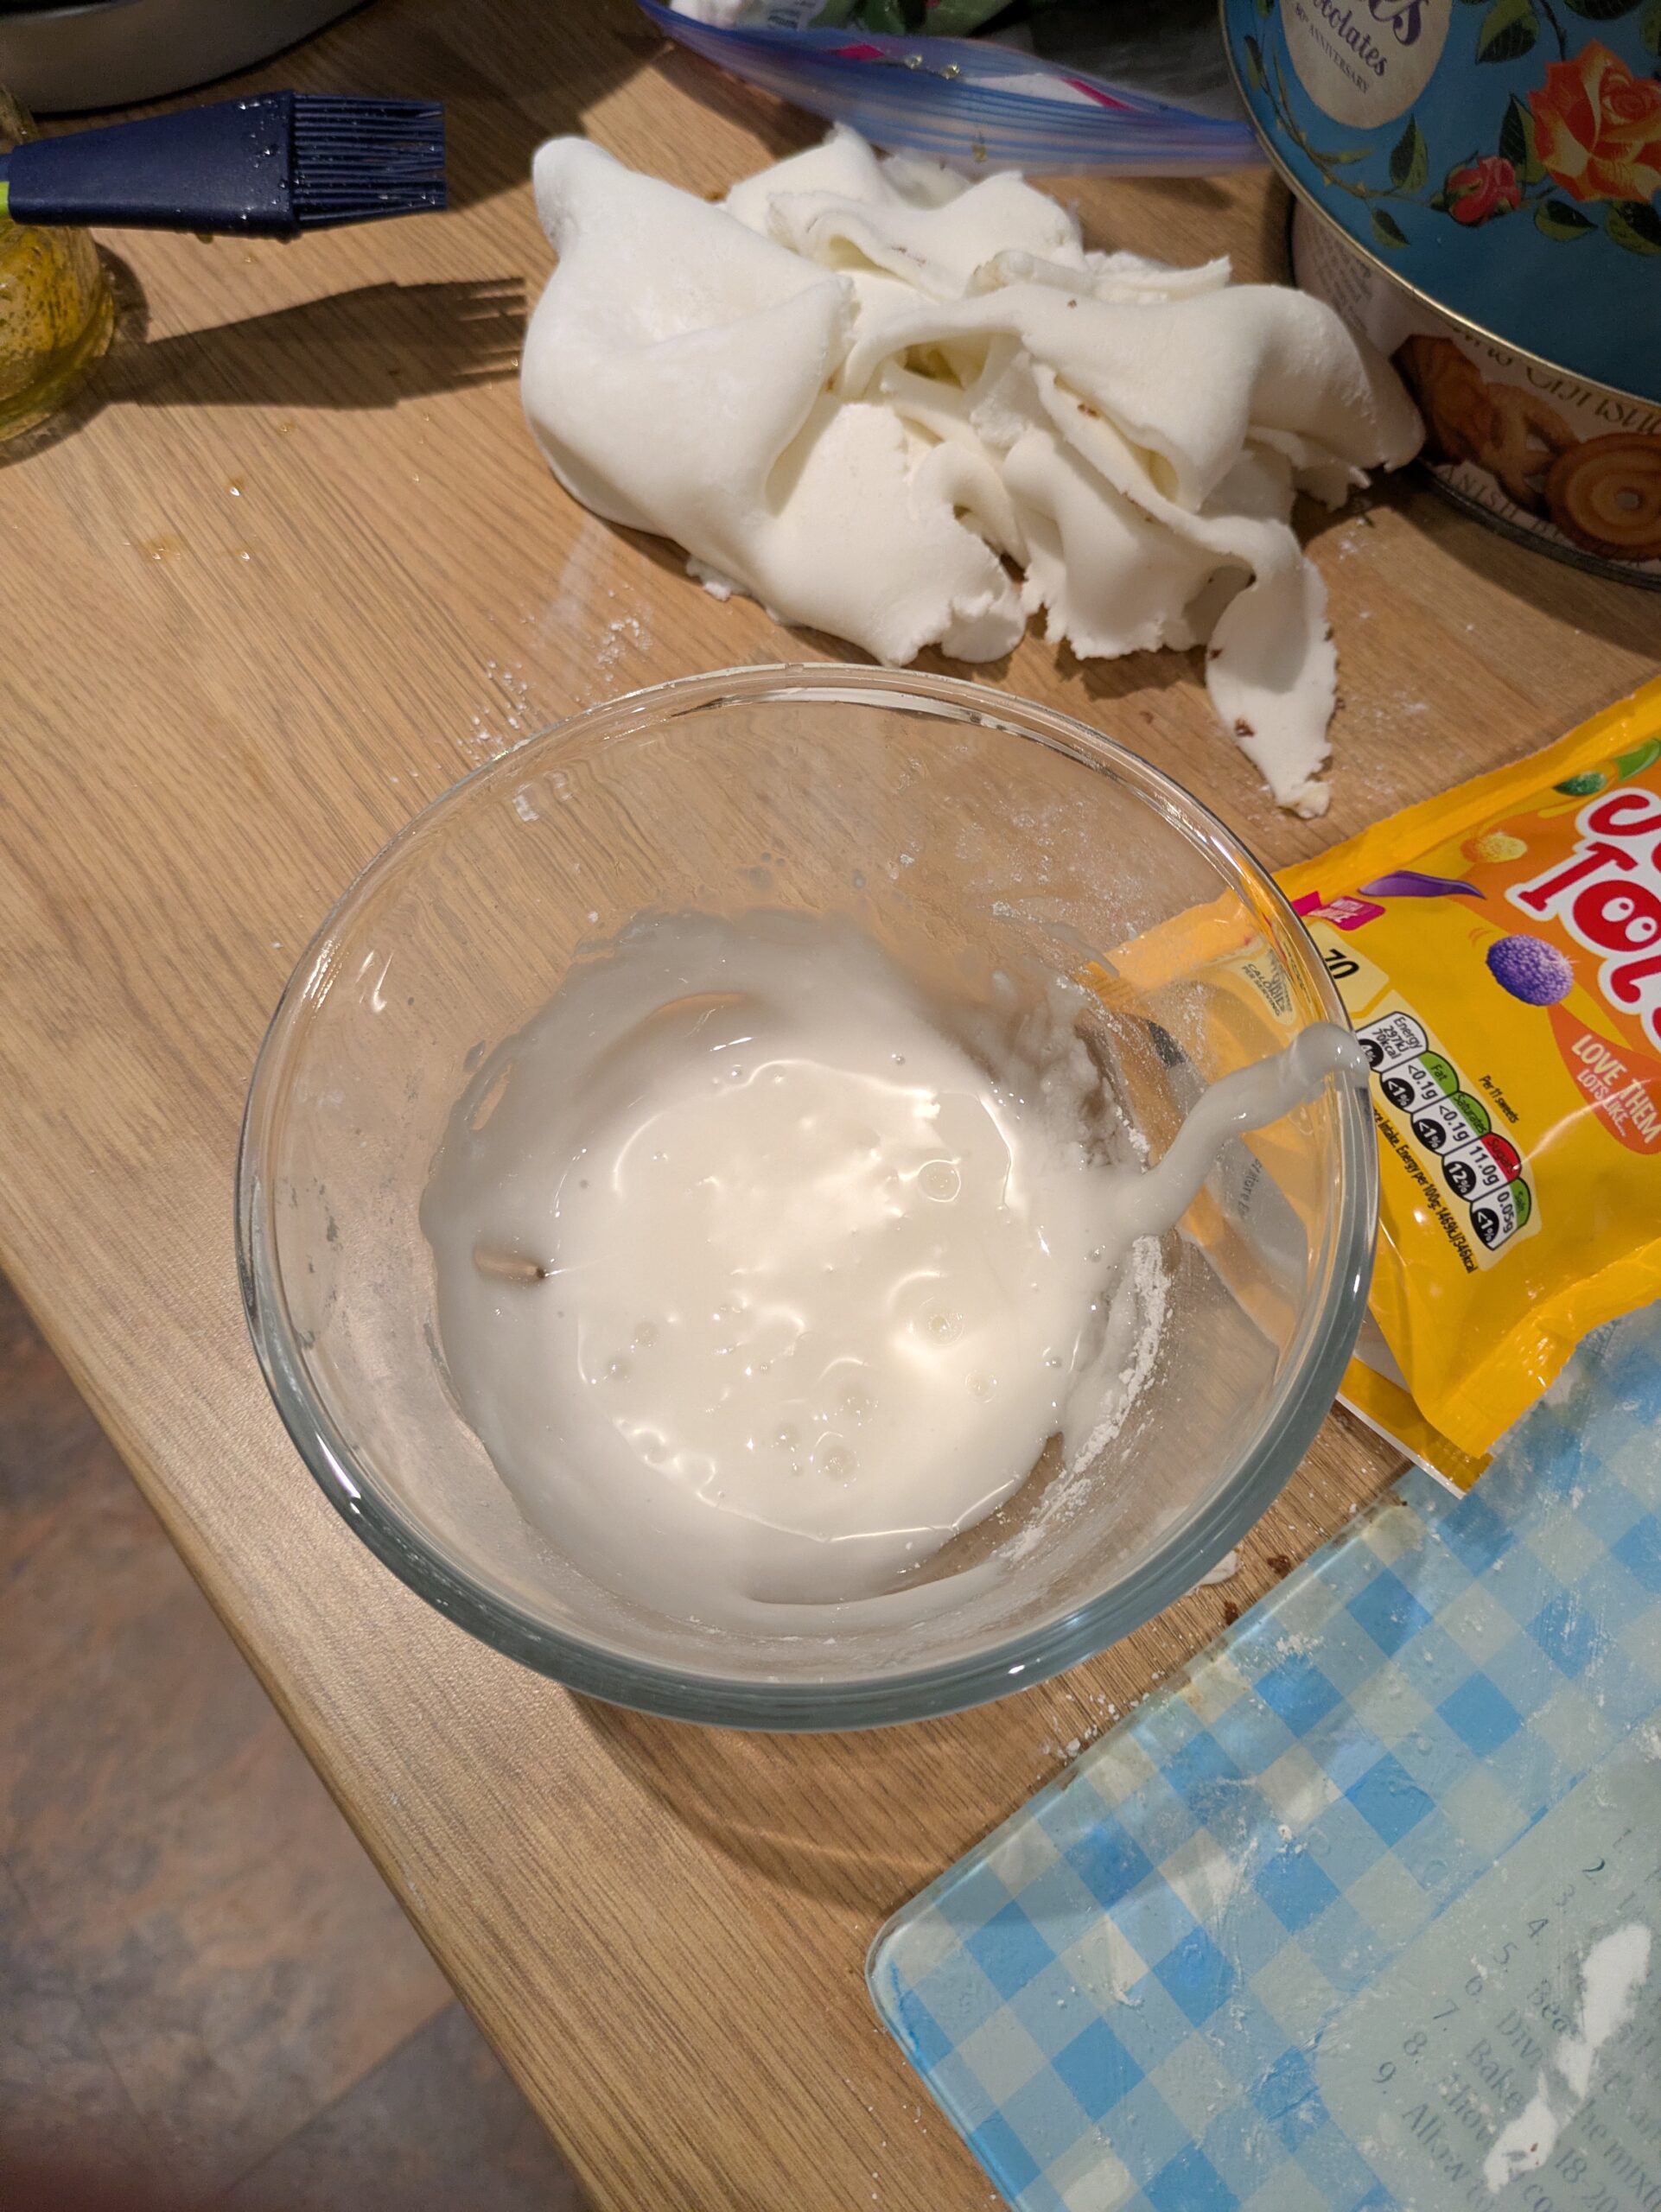
Step 9:
Make up some simple glace icing by mixing some icing sugar (powdered sugar) with water until you get a reasonable consitency. You don’t want it to be too runny – it should be easy to spread but should stay where it is put. Find some sweets to use as the border – I used Jelly Tots, but all sorts of things would work.
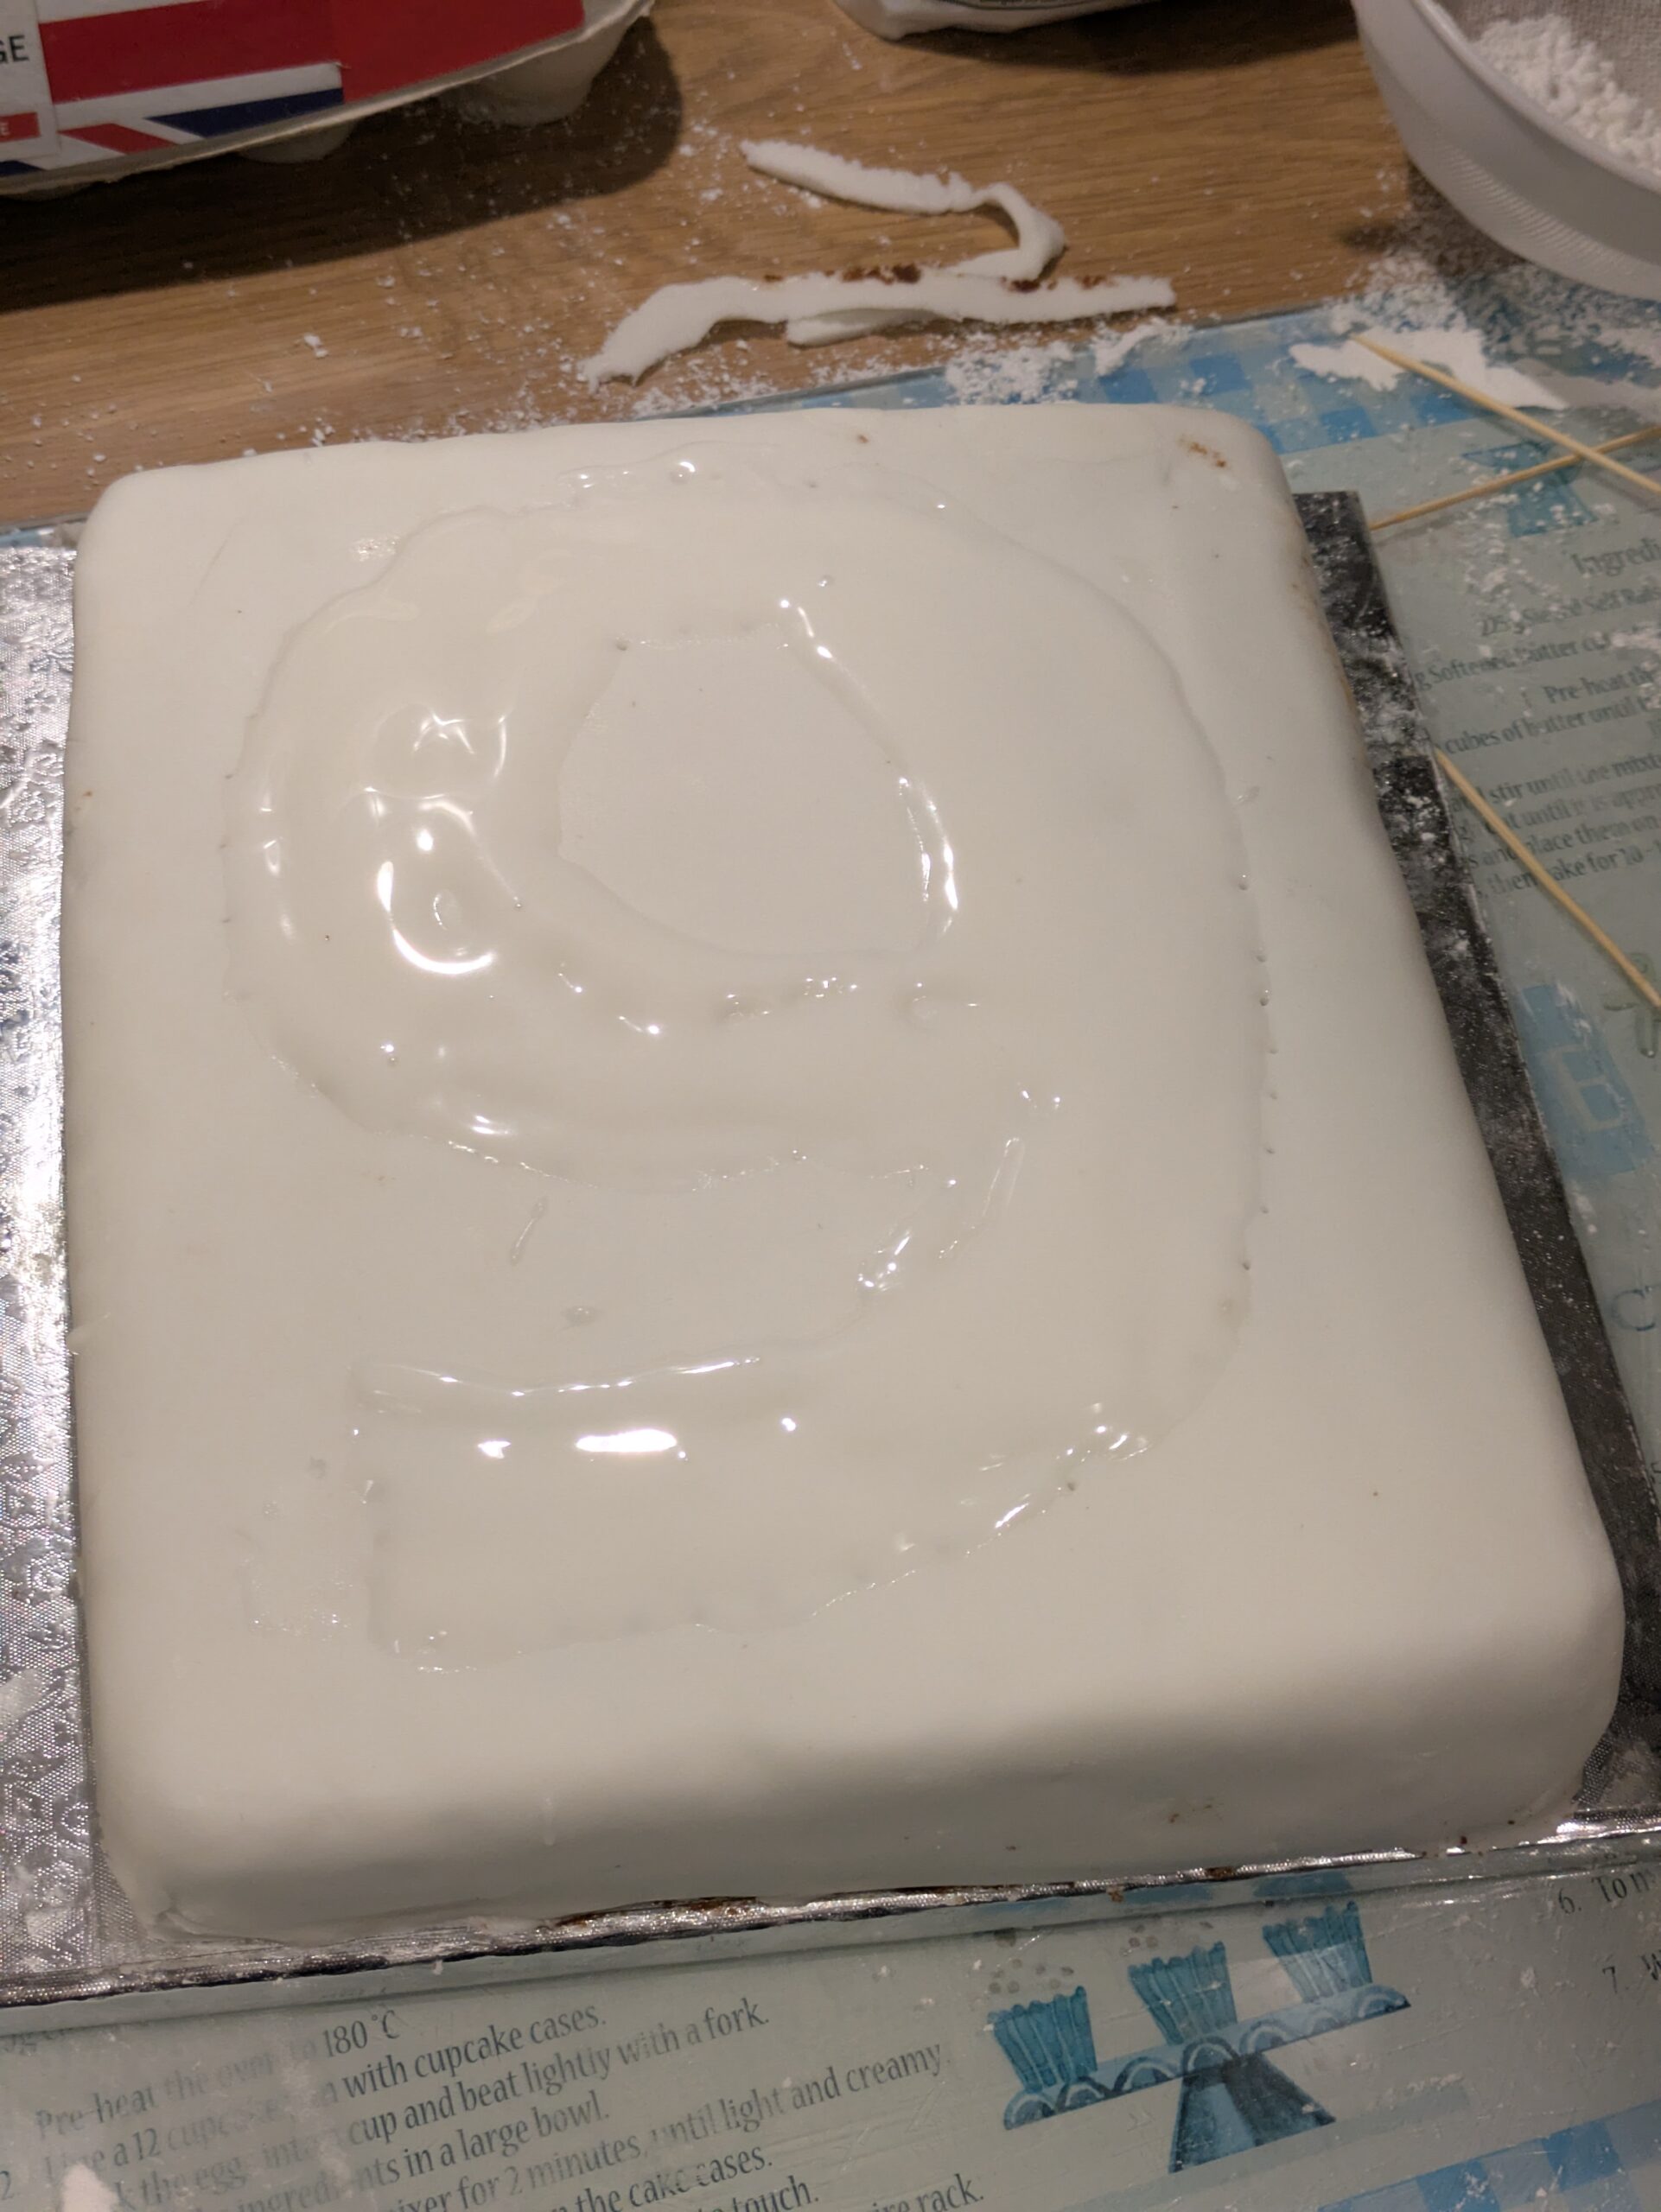
Step 10:
Using a palette knife or a small spoon, spread the glace icing inside the pricked outline, covering the pricked holes but not going too far outside them
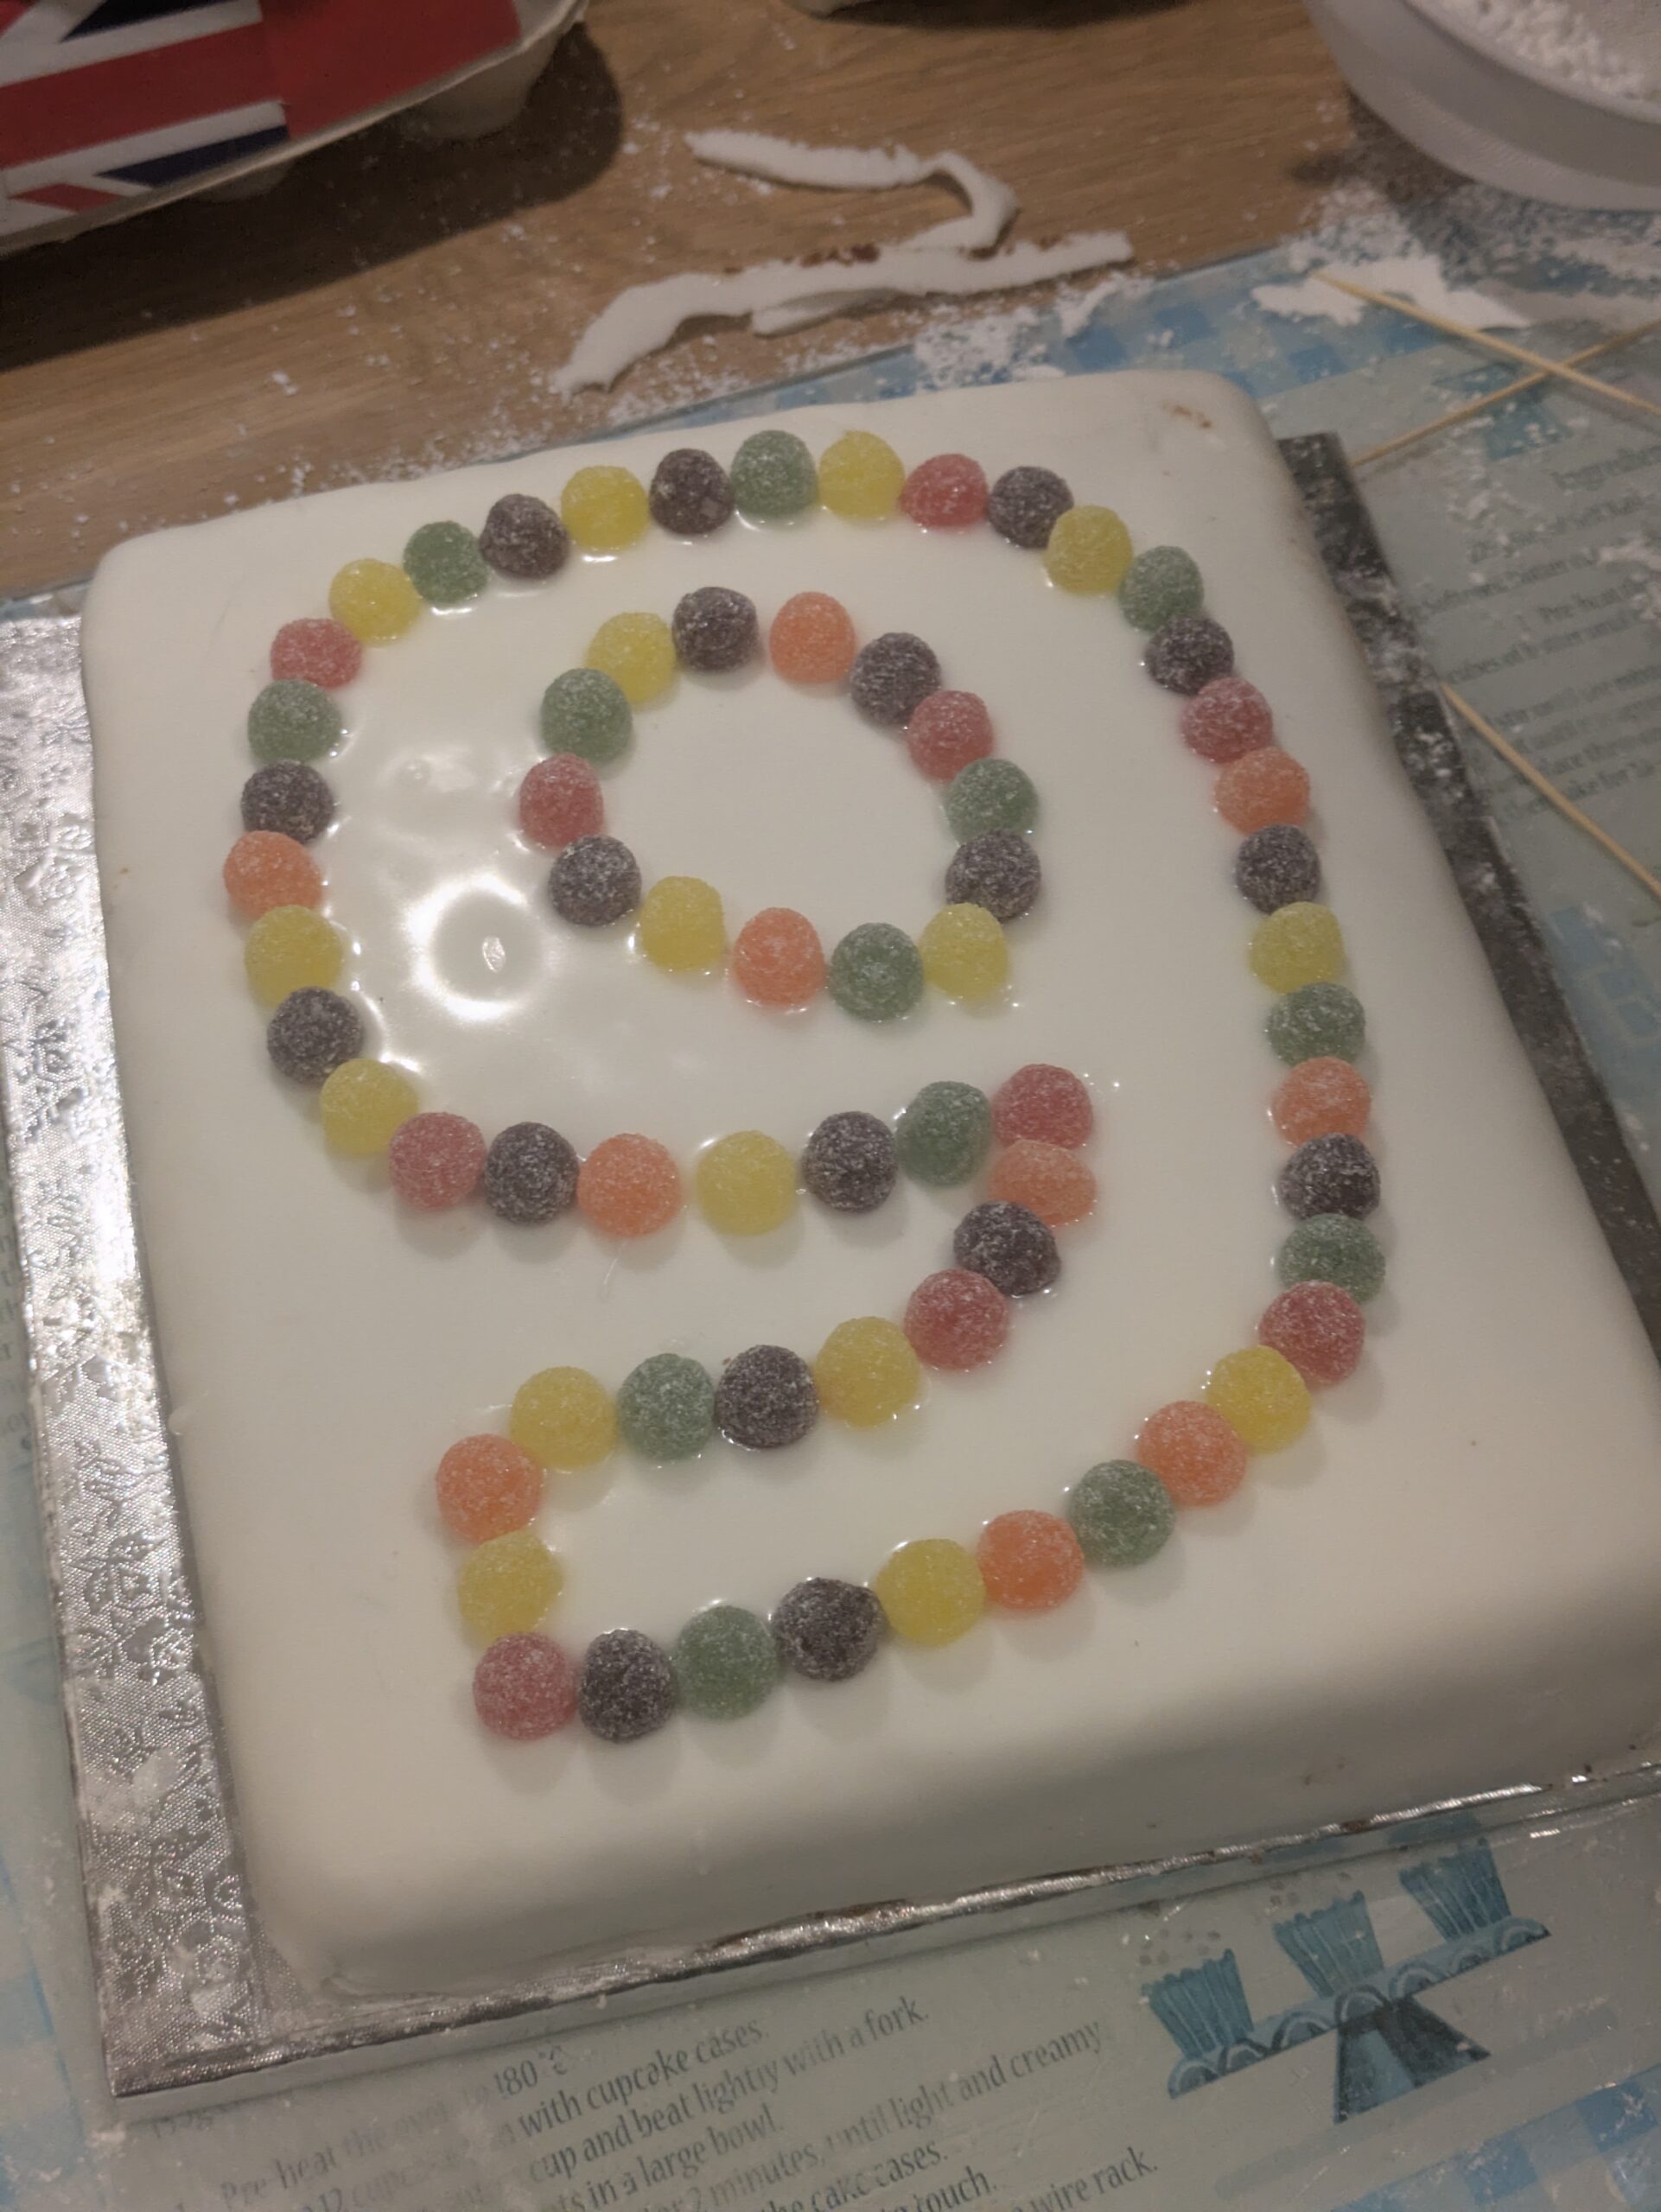
Step 11:
Stick sweets to the cake following the outline. To make it look nice, try not to have two sweets of the same colour next to each other.
Step 12:
Fill the middle of the shape with sprinkles or other sorts of sweets – I usually use a mix of different types of multi-coloured or chocolate sprinkles, but have used marshmallows and chocolate chips sometimes.
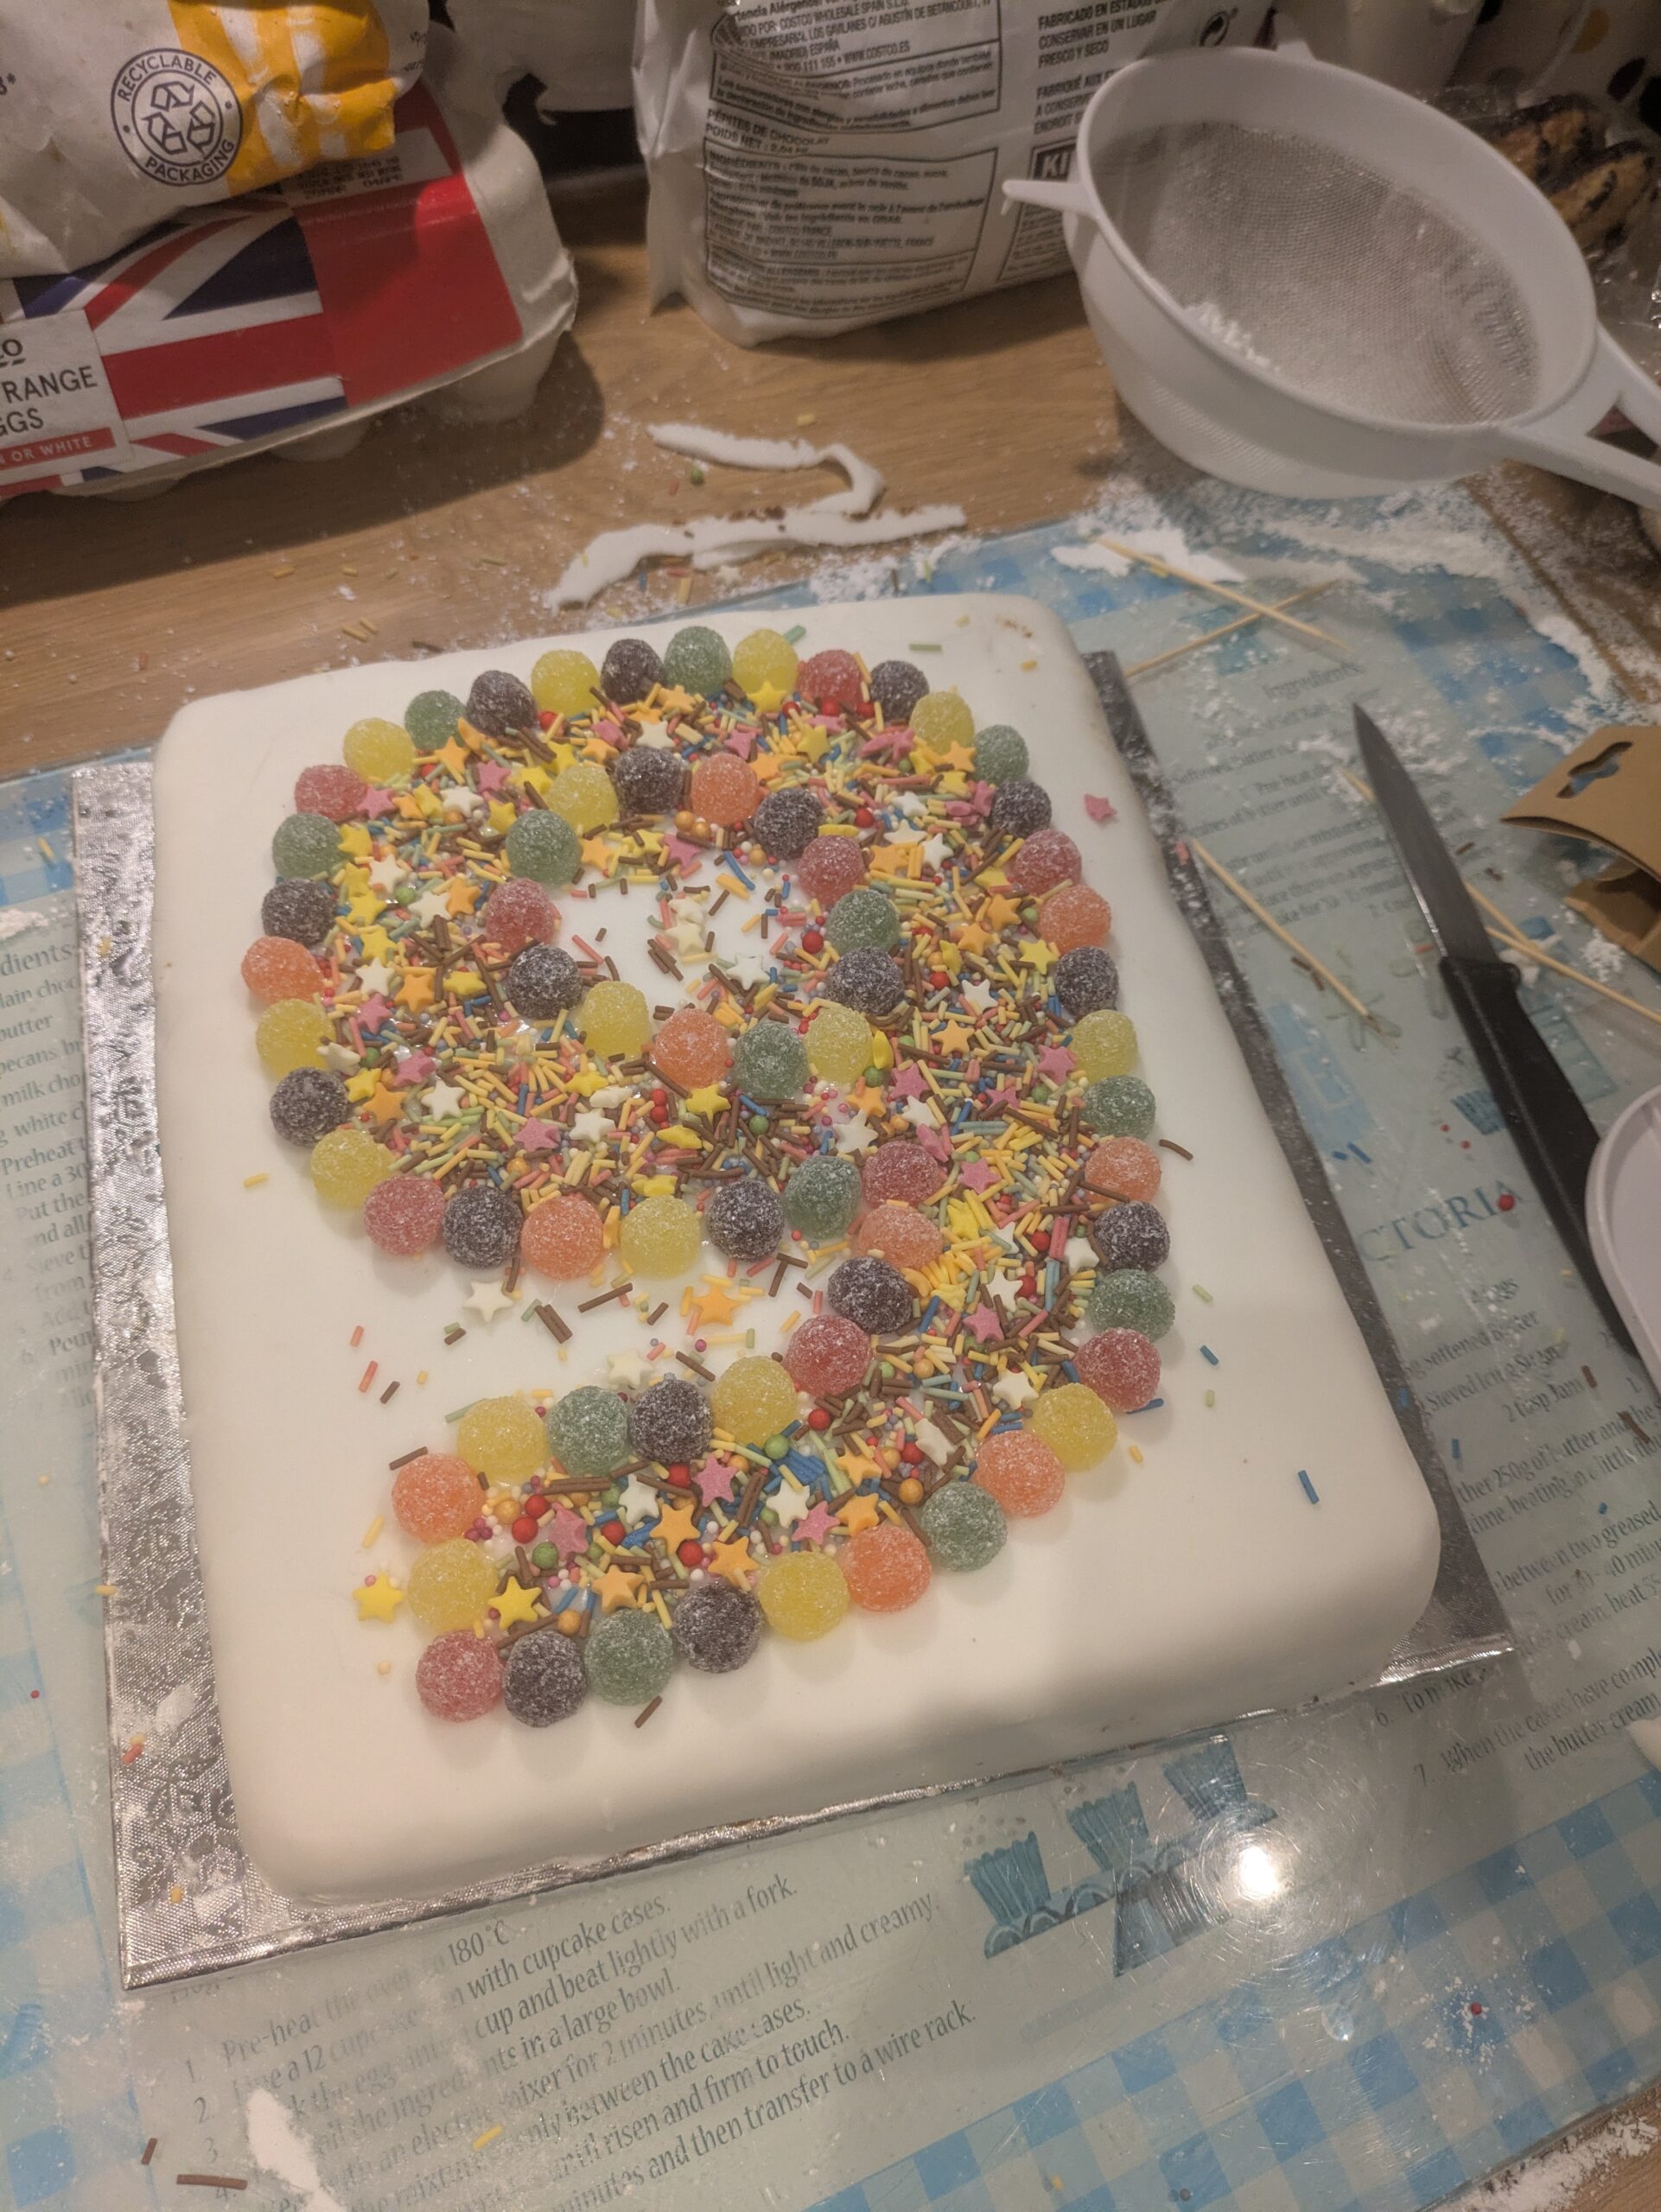
Step 13:
Use your fingers or a small brush to get rid of the sprinkles that are outside of the shape. You’re done! It should look something like this:
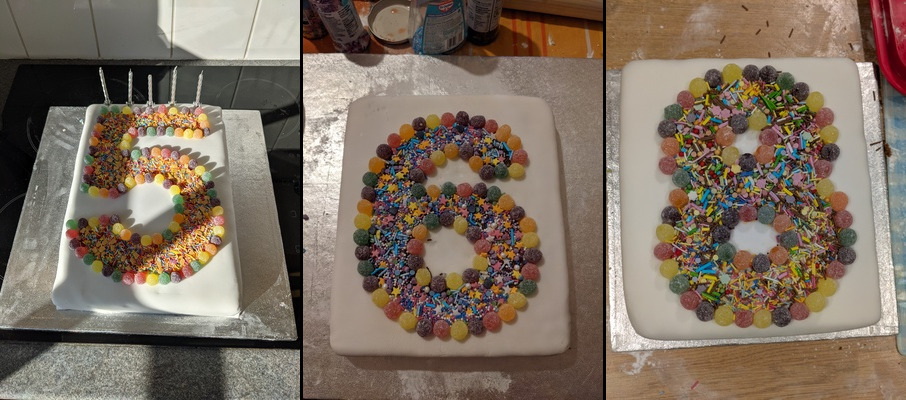
Some examples of other ones I’ve made:
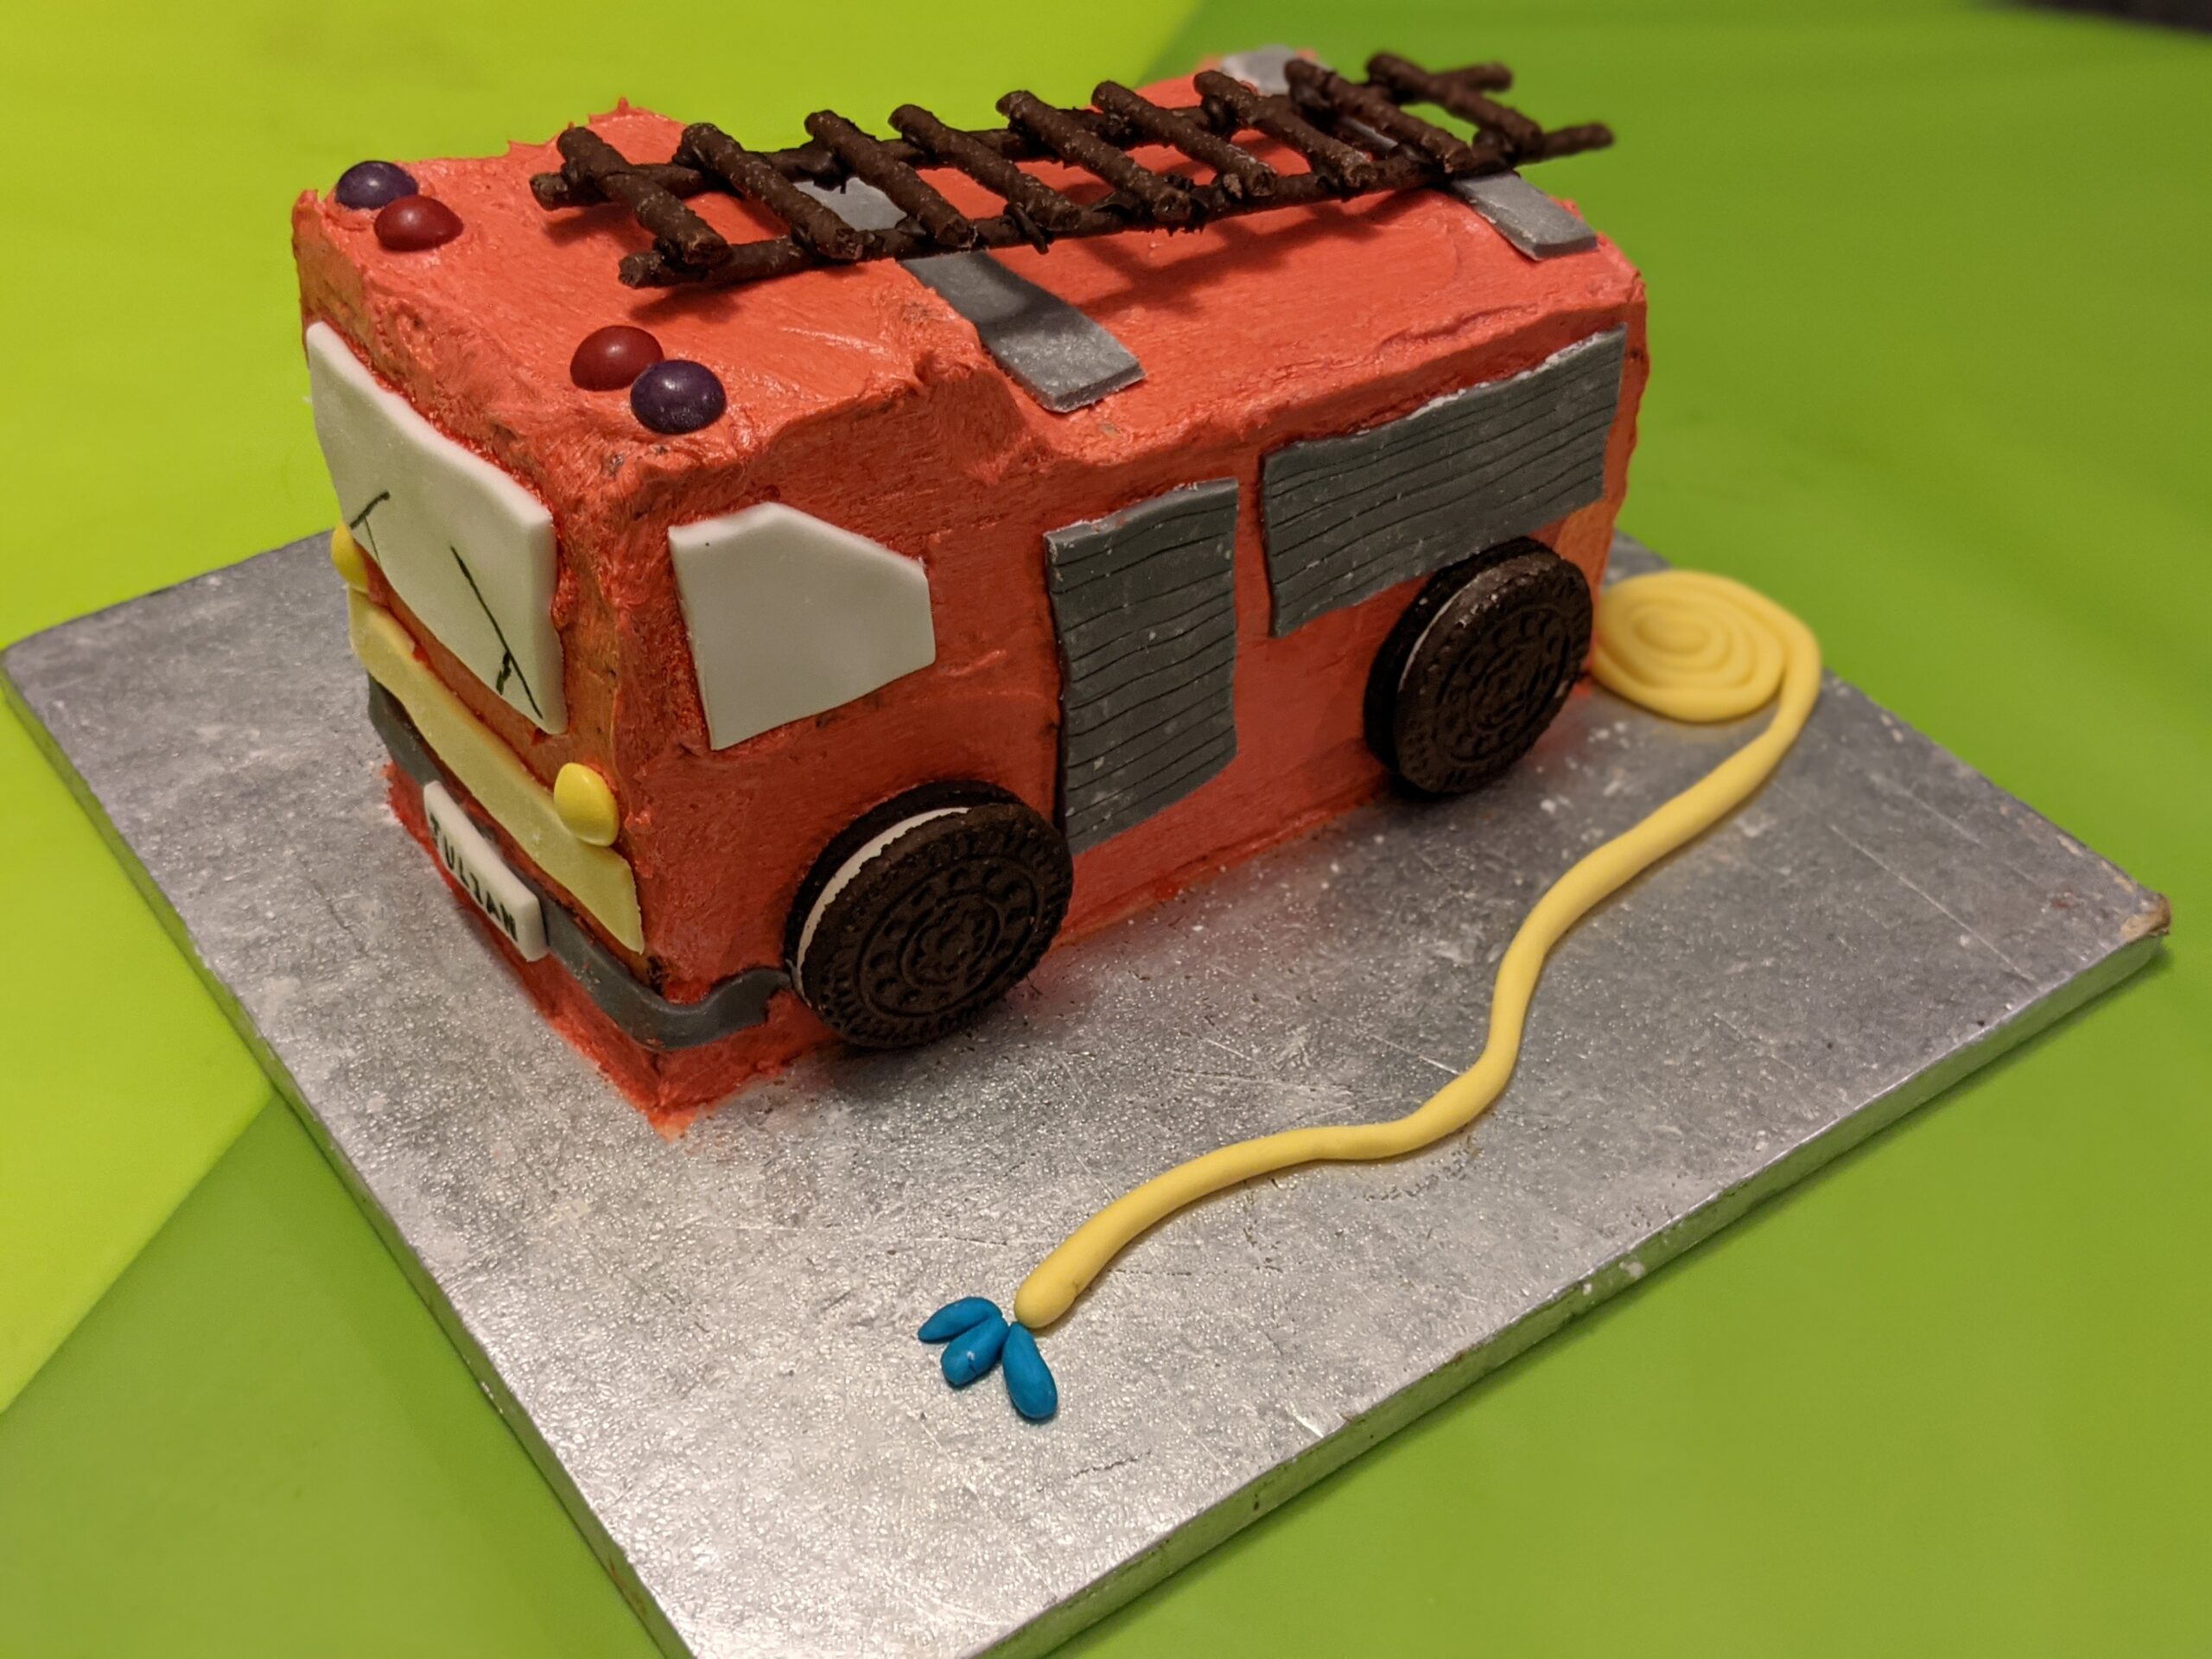
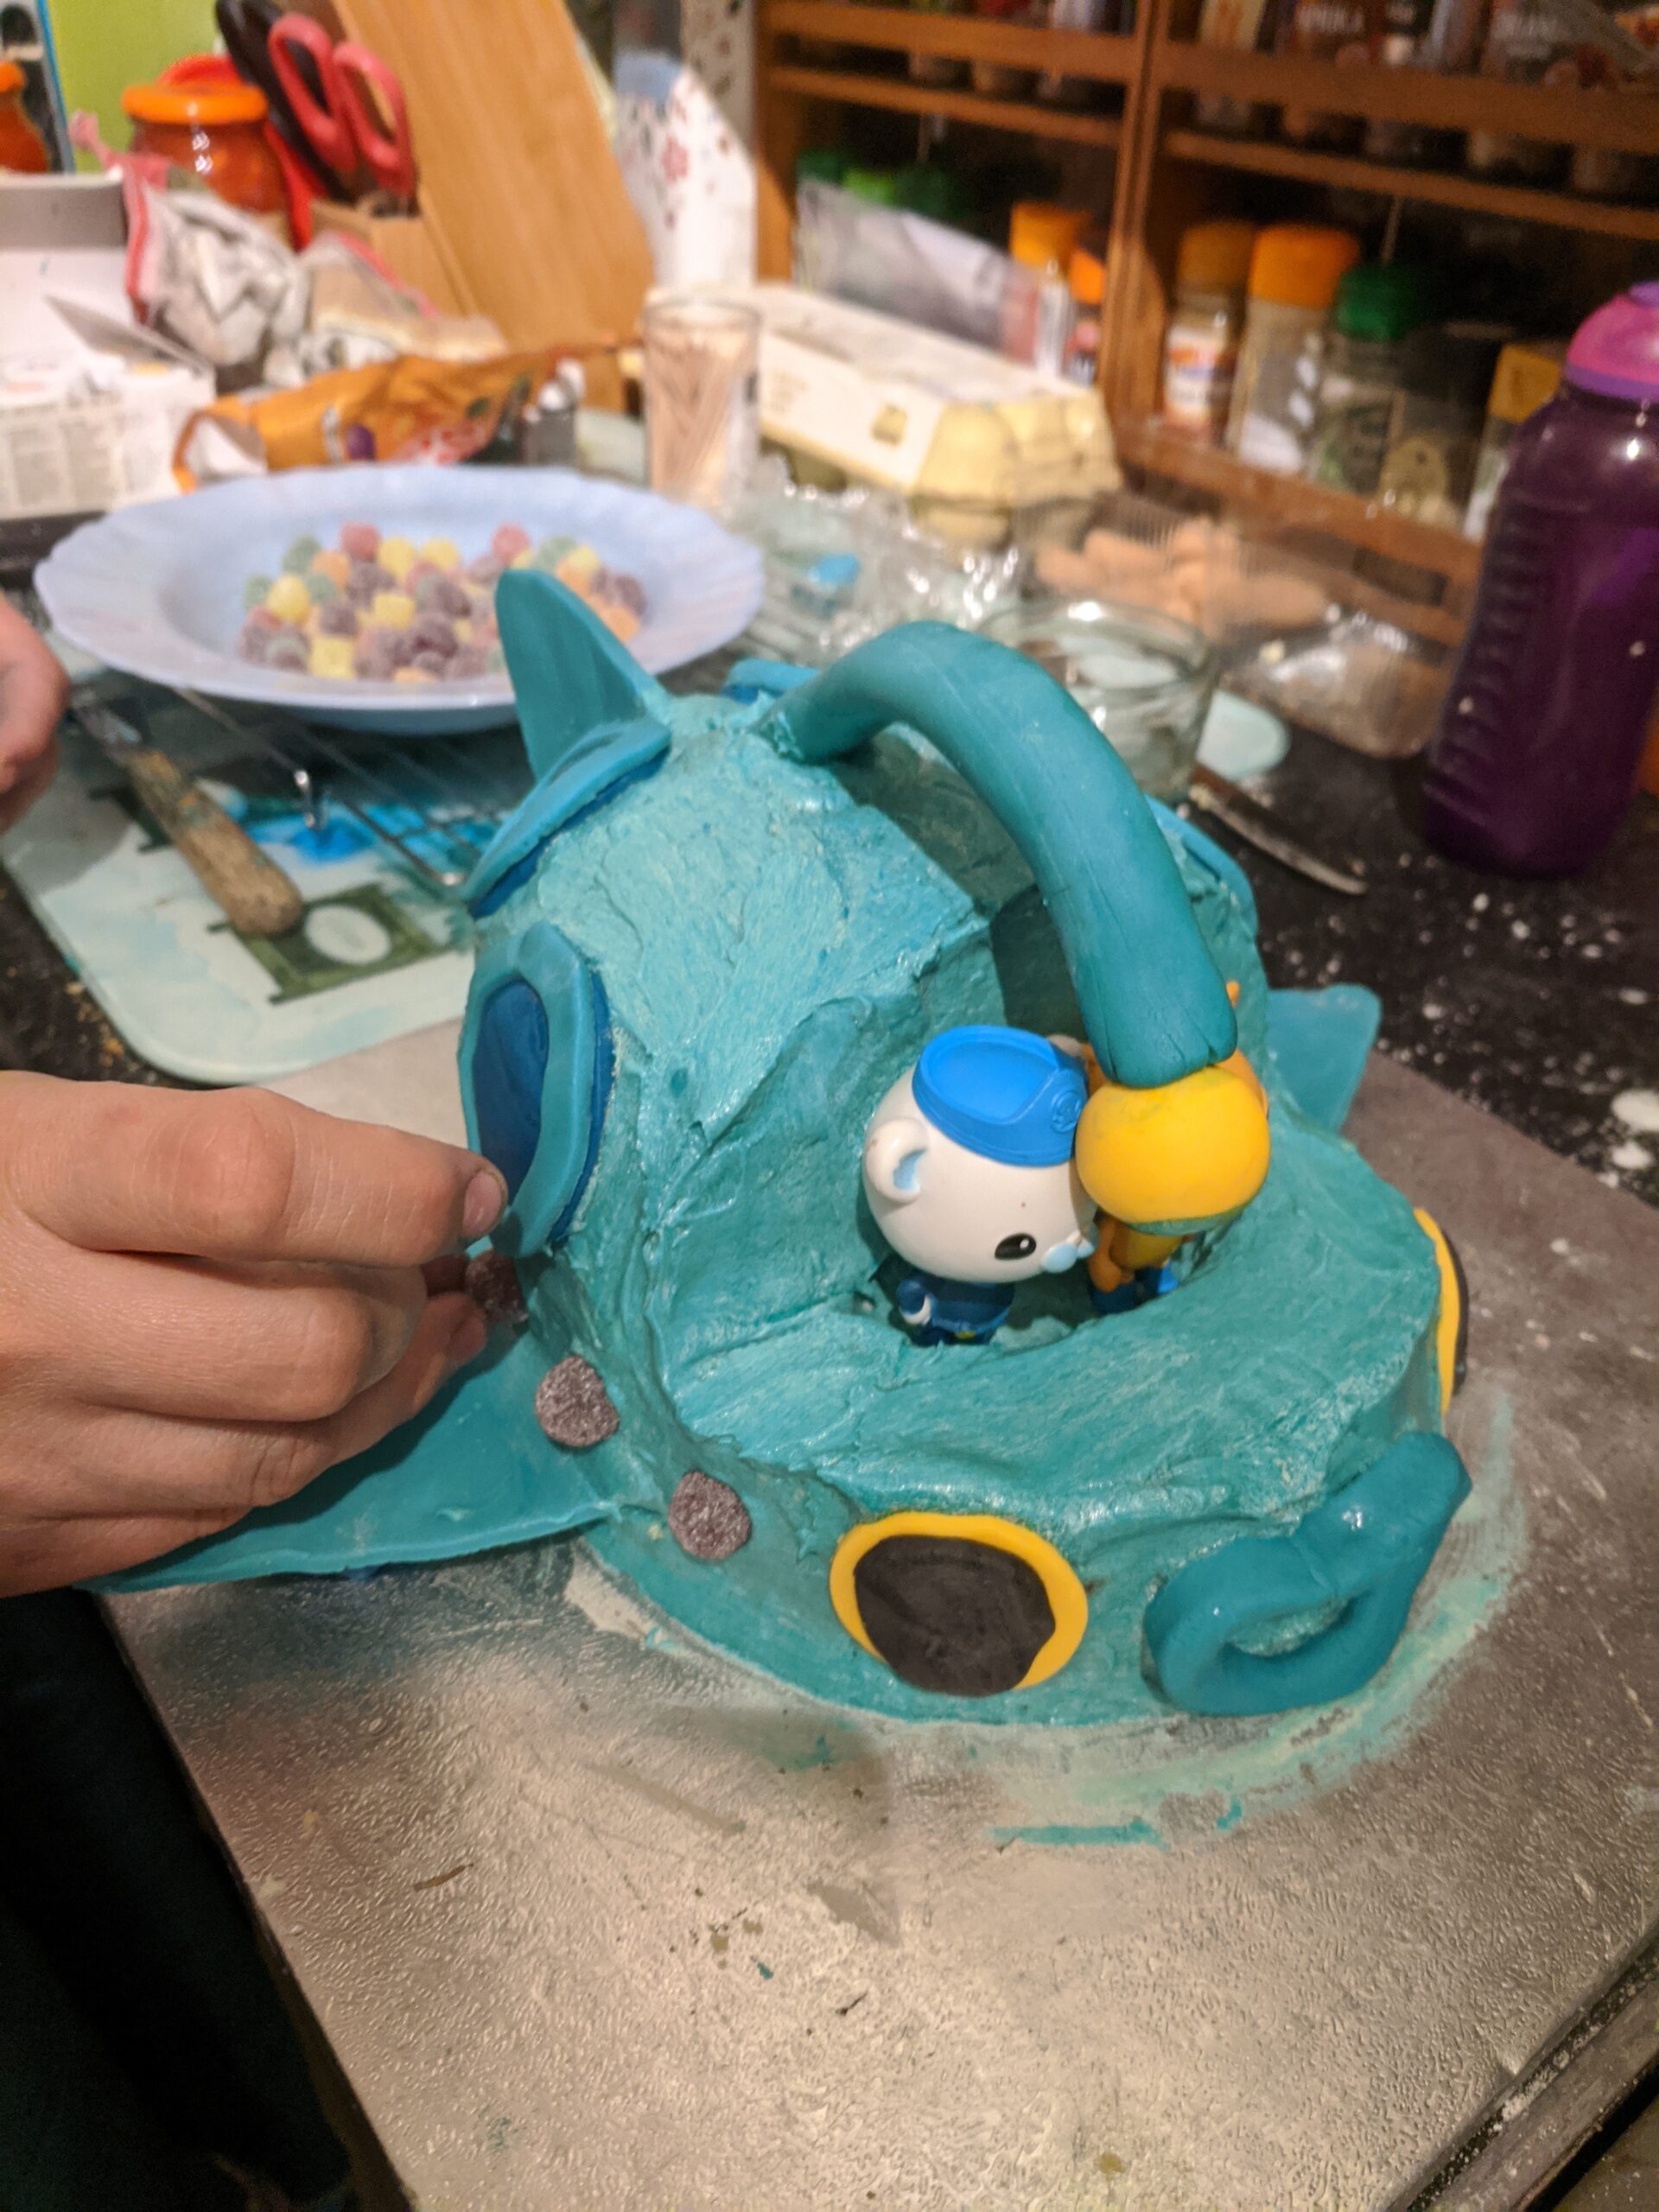
Other decorated cakes I’ve made:
Now I’ve shown you how to do a simple cake, I can show off a bit with some of the more complicated cakes. Again, click on the image to enlarge. First, a fire engine for my son:
A GUP-A submersible from the Octonauts TV programme:
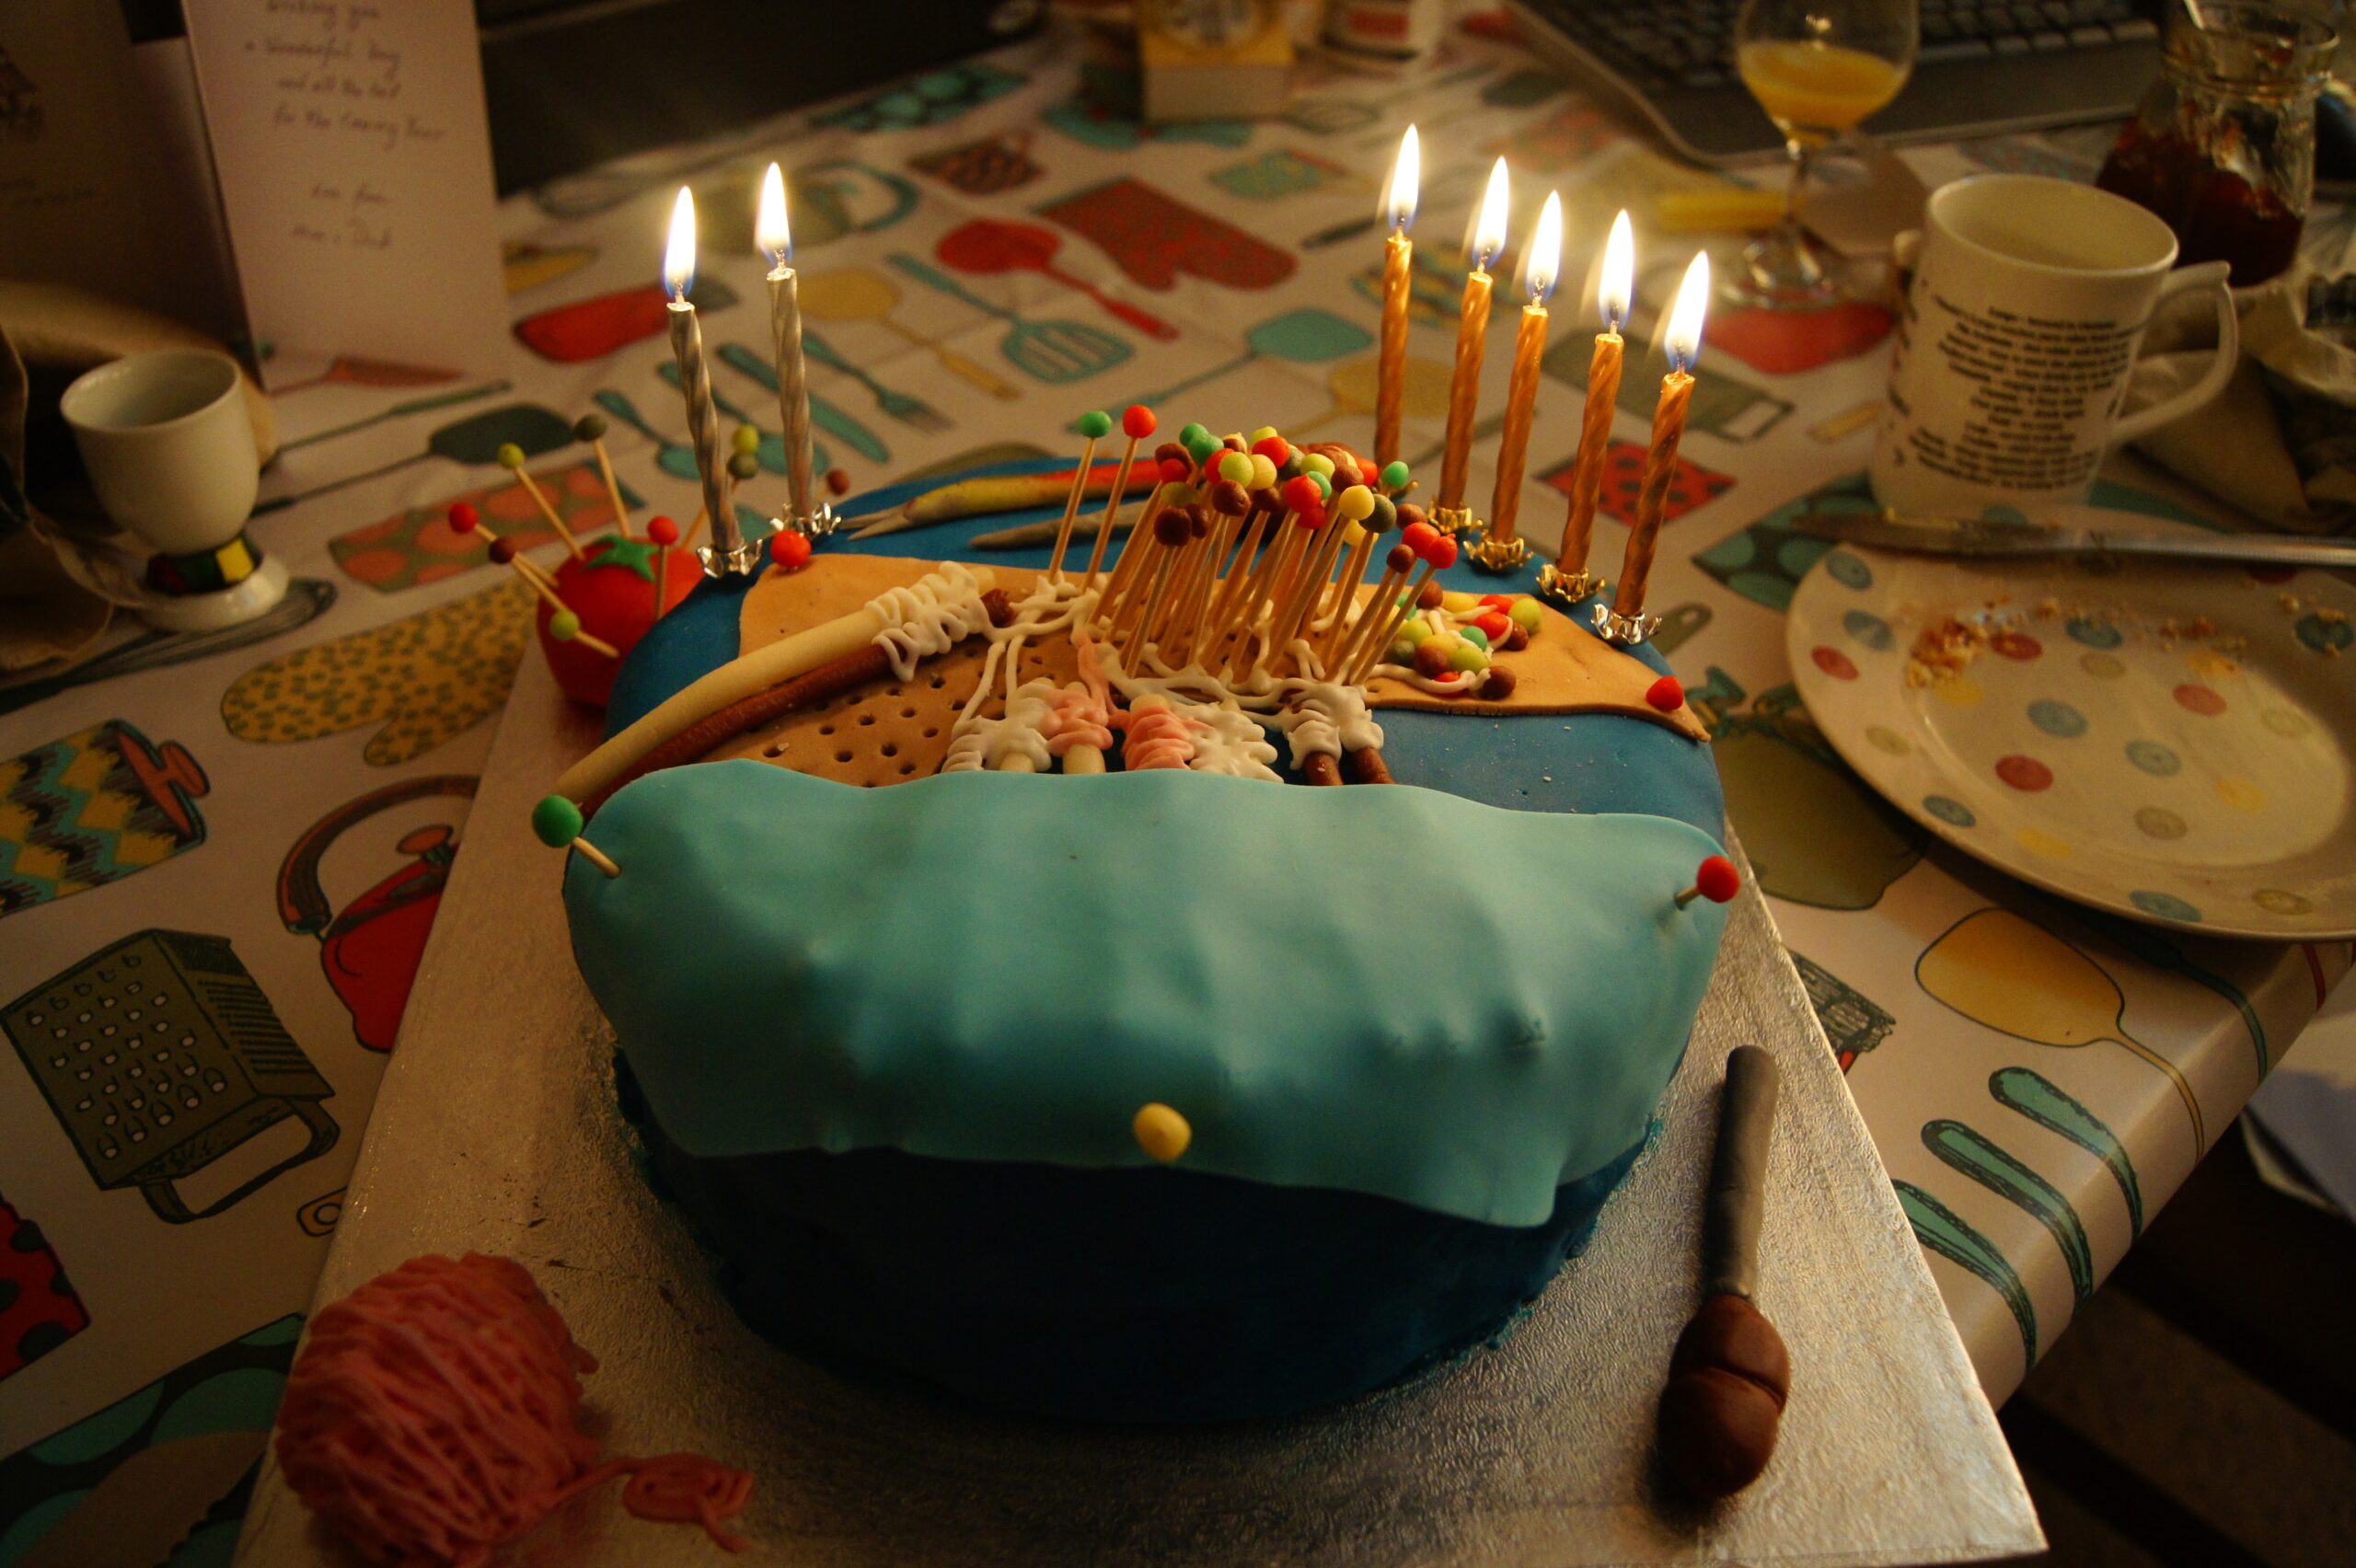
A lace making pillow for my wife – including lace pillow, bobbins, thread, pins, pin pusher and ball of thread:
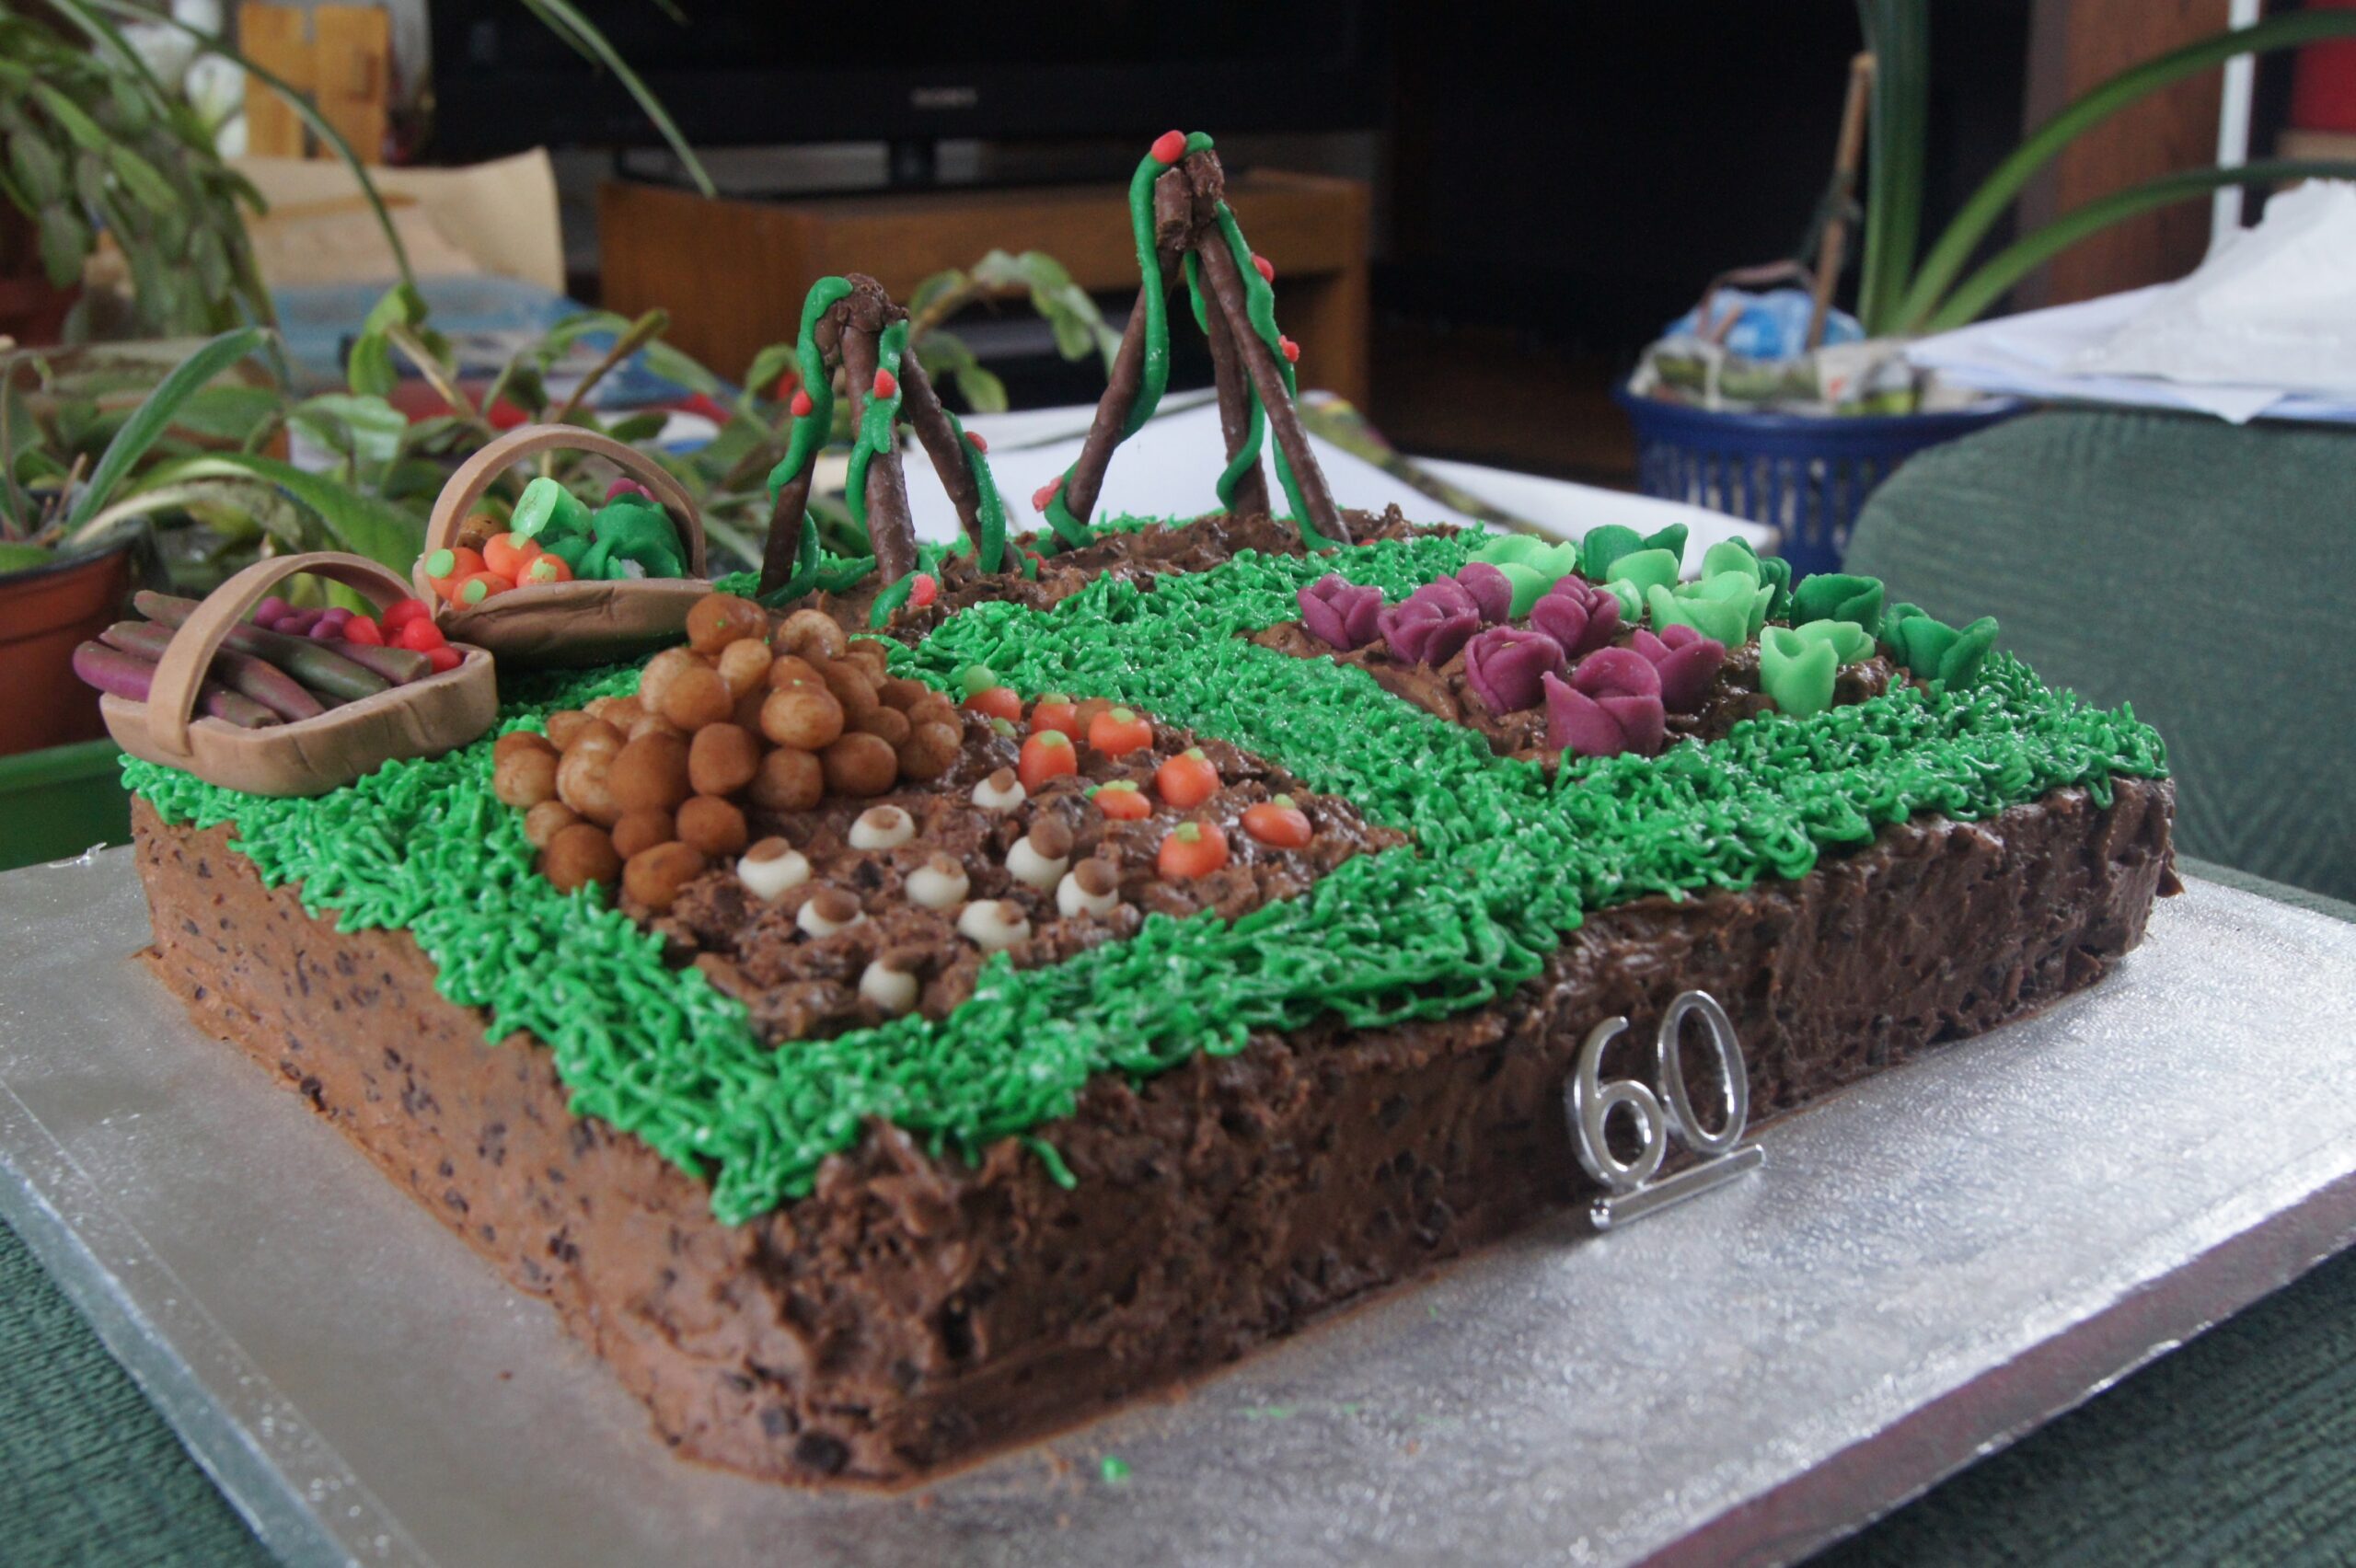
A garden cake for my Mum, with vegetables and fruit modelled out of icing and marzipan and buried in the cake:
My next post will be back to tech stuff – but I hope you enjoyed that little diversion into cake decorating.
If you found this post useful, please consider buying me a coffee.
This post originally appeared on Robin's Blog.
Does this only work if you have a simple but effective child?